Adding a Site
You can add specific settings to the site you are currently creating. Users assigned to this site inherit settings as defaults but can override them with the corresponding options in My Profile.
Add a Site
- Click Settings & Tools > Company Setup, and then click Sites.
- Click New.
- In the Site Information section, do any of the following:
-
For Name, type a name that uniquely identifies the site.
-
For Reference ID, if you are using the Automated User Synchronization feature, type the identifier for the site name in the sync file which may be different than the Policy & Procedure Management site name. The reference ID may or may not be the same as the site name. When users are imported from a sync file, they are assigned to sites based on site reference IDs rather than site names. If you are not using Automated User Synchronization, the site name and reference ID can be the same.
-
In the Default Display Options section, do any of the following:
For Default View, select which site displays each time when a user logs in.
For Filter by Language, select Yes to hide documents and assessments that are not in a user's preferred language. Select No to allow users to see all items regardless of their assigned language.
Note: When a site is first added, it inherits the language setting from General Properties in Company Setup. Thus, the site's initial Filter by Language setting is (Default).
- In the Search/Browse Options section, do any of the following:
- For Default Relationship View, select the default My Relationship setting that will appear when using Search and Browse.
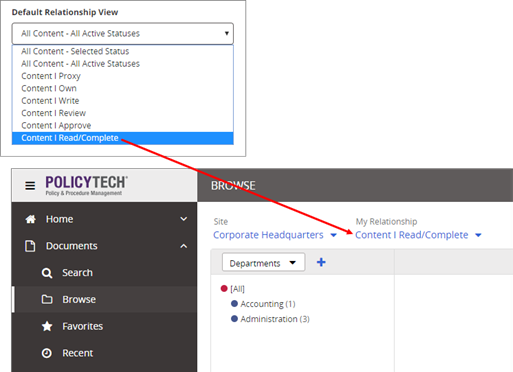
Note: If a user is not assigned the role corresponding with the default relationship view, My Relationship will default to All Content - Selected Status for that user. For example, if you select Content I Approve as the site default, the default My Relationship setting for a user with only the Assignee role will be All Content - Selected Status.
For Default Search/Find Field, clear the System Default check box if you want to select a default type from the available search options, such as All Search Fields, Title, Full Text, Keywords, or Reference # that users will see when using both the Search and Find feature in Browse.
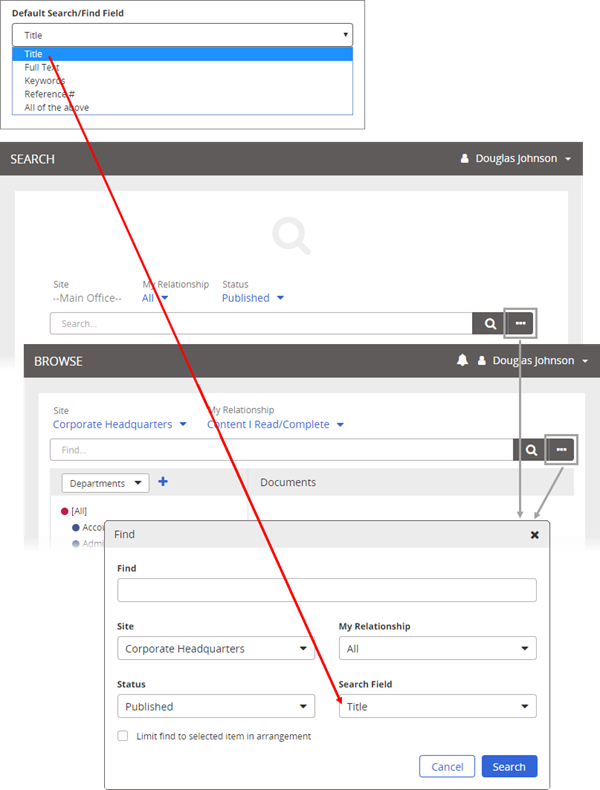
Note: The Full Text option applies only to Search and Find in the Documents area. If you select Full Text, then Search and Find in the Assessments and Campaigns areas it defaults to Title.
For Default Browse Arrangement, select the Arrange By options in a Browse list that determines which is selected and in effect when a user first accesses a Browse option after login.
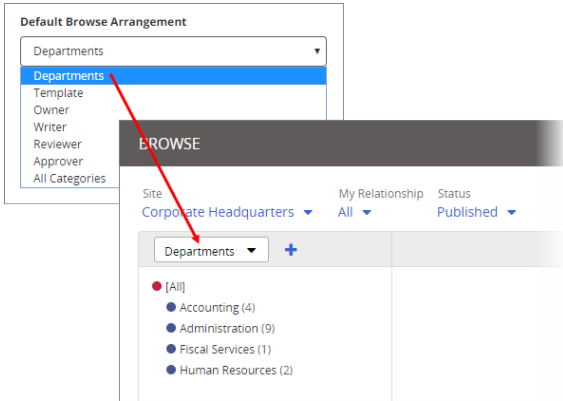
Select Limit find to selected item in arrangement to have only those items in Browse be selected by default.
- For Default Relationship View, select the default My Relationship setting that will appear when using Search and Browse.
- In the Regional Settings section, set the Time Zone, Time Format, Date Format, and Language for the site. When you create a site, it inherits the current regional settings in General Properties, and all site regional settings show (Default).
- In the Anonymous Access section, select the Turn on Anonymous Access for this site check box to allow anyone (including Policy & Procedure Management users) access to any published document assigned the All Users or Public security level. An anonymous user with no user name or password needs only the site URL to view the content for the site without logging in.
- For Site URL an entry is auto-generated by Policy & Procedure Management the first time you save the site. You cannot change or delete the URL.
- For IP Range(s), type one or more IP ranges to limit the IP addresses that can log into the site anonymously. is required for security.
Note: Each computer on a network has an IP address, which belongs to a specific range of IP addresses assigned to the organization hosting the network. To ensure that only intended users can log into PolicyTech site anonymously, you must provide a range, or ranges, which contains the computer IP addresses of any users to whom you want to give anonymous access. Contact the network administrator of the organization whose users will be logging into the site anonymously to obtain an IP address range.
You can use both IPv4 (32 bit) and IPv6 (128 bit) IP address formats to specify a range. Type the lower limit of the IP range first, followed by a dash and then the upper limit of the IP range. To include multiple ranges, separate each range with a comma. Do not include a space before or after the comma.
IPv4 addresses are represented as four numbers separated by periods where each number can be zero to 255, for example, 1.160.10.240.
IPv6 addresses are represented as eight groups of four hexadecimal digits separated by colons, for example, 2001:0db8:85a3:0042:1000:8a2e:0370:7334.
- In the Public Viewer section, an entry is auto-generated by Policy & Procedure Management. You cannot change or delete the URL. This setting is for sites that allows anyone who is not a Policy & Procedure Management user to access any published document assigned the Public security level. A public viewer needs only the site URL to access the site's published documents—no user name or password is required.
Important: The Public Viewer module must be purchased separately and enabled for your organization. If you have questions about or want to purchase the Public Viewer advanced feature module, contact NAVEX Customer Support by submitting a request in the Community.
- In the Content Logo section, to allow users to insert a logo into documents or templates, do one of the following:
- Click Import Default Logo, to use the graphic file already present in Company Setup > General Properties.
- Click Browse. Find and select a different graphic file for the current site, click Open, and then click Upload File.
- Click Save.
This publication was written and produced at NAVEX Global, Inc., Lake Oswego, Oregon. This publication or any portion thereof is confidential and/or proprietary and may not be reproduced or used in any manner whatsoever without the express written permission of NAVEX Global, Inc.
Copyright © 2026 NAVEX Global, Inc. NAVEX Global® is a registered trademark/service mark of NAVEX Global, Inc. The NAVEX Global® logo is a trademark/service mark of NAVEX Global, Inc. Unauthorized use of NAVEX Global, Inc.’s trademarks/service marks is strictly prohibited without prior written permission from NAVEX Global, Inc.