Exporting Documents
Important: Exporting documents is an optional feature depending on your Policy & Procedure Management license. If you have questions about or want to purchase the Export Documents module, contact NAVEX Customer Support by submitting a request in the Community.
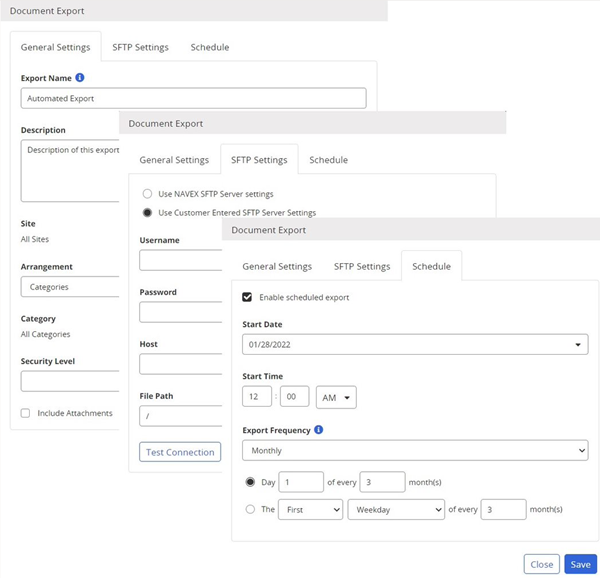
You can schedule the export of documents from Policy & Procedure Management using the Document Exports module. Setting up an automated export consists of adjusting general settings, providing the required SFTP connection information, and setting a recurring export schedule. The recurring export of documents automatically generates an export file and sends it to a specific SFTP server. You can schedule the export daily, weekly, monthly, or yearly on any given day, whatever is best for your organization.
Considerations for Exporting Documents
-
You cannot exceed five automated document exports. If you require additional exports, contact NAVEX Customer Support by submitting a request in the Community for assistance with increasing the number of allowed exports.
-
If no documents meet the selection criteria, the export cancels and no files are sent to SFTP. An email notification is sent to the user and the total allowed number of allowed exports is not increased.
Create a document export file
- Click Settings & Tools > Tools, and then click Data Exports.
- In the Document Exports pane, click New Data Export.
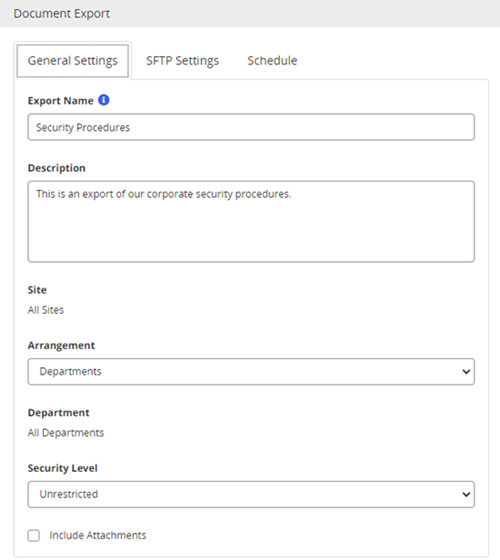
- In the General Settings tab, do the following:
-
For Export Name, type a unique name for the export file.
Note: The Export Name is part of the export file name, therefore, use only characters allowed in file names. Unsupported characters include the following: @ $ % & \ / : * ? " ' < > | ~ ` # ^ + = { } [ ] ; !
-
(Optional) For Description, type a description for the export.
-
For Site, select All Sites or a single site, then click OK.
Note: The All Sites option is only available to global administrators.
-
For Arrangement, select how you want the output arranged. If you select Departments, the Department field will contain All Departments by default and is not changeable. If you select Categories, the Category field will contain All Categories by default and is not changeable.
-
For Security Level, select a security level for the documents you want to export. Available options are Unrestricted - Documents with the All Users or Public security setting, Restricted - Documents with an elevated security level setting, All Documents - Restricted and Unrestricted documents, combined, and Both - Restricted and Unrestricted documents, each exports with its own separate folder and index files.
-
(Optional) If you want to have any documents in your selection that contain attachments to be included in the export, click Include Attachments.
-
(Optional) If you want to view the source documents as PDFs within your browser, click Export Word documents as PDF.

-
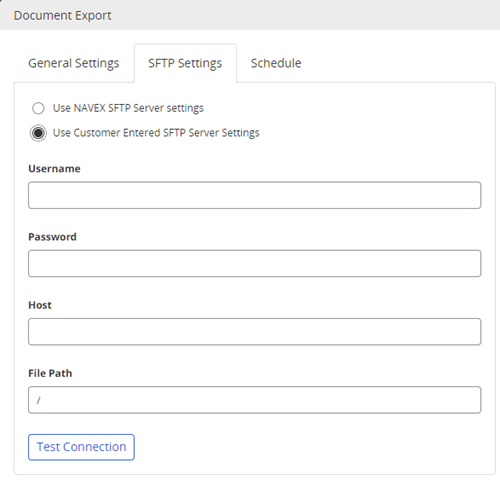
Click the SFTP Settings tab, and then do one of the following:
-
Click Use NAVEX SFTP Server settings. This option requires you to type a value in the File Path.
-
Click Use Customer Entered SFTP Server Settings. This option requires you to type a value in the Username, Password, Host, and File Path fields.

Important: If you plan to use SFTP connections, you must contact NAVEX Customer Support for assistance. As the administrator of Policy & Procedure Management you are responsible for all SFTP settings.
-
-
Click Test Connection to validate the connections settings.
-
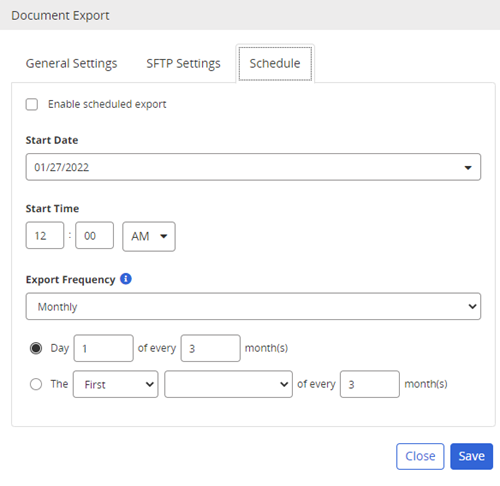
Click the Schedule tab, and then do the following:
-
Click Enable schedule export to allow a scheduled export.
-
For Start Date, click the calendar and select the date or type the date you want the export to start.
-
For Start Time, type the hour and minute, and then click AM or PM.
-
For Export Frequency, click Daily, Weekly, Monthly, or Yearly, and then select the applicable conditions.

-
-
Click Save.
Note: The global administrator will receive an email if the export is unsuccessful.
-
Find the .zip file in the File Path you specified in the SFTP Settings and extract its contents to a location of your choice.
-
The export file name has the following format: Export name_export date_security level.zip (Restricted, Unrestricted, All or Both). For example, if you have "Automated Export" for the Export Name and you selected All for the security level, then the file name will be Automated_Export_[export date]_All.zip.
-
For the same example, if you selected Both for the security level, the zip file will contain two folders: Automated_Export_[export data]_Restricted and Automated_Export_[export date]_Unrestricted.
-
Edit a document export file
You can edit an existing document export file, if needed, to modify the recurring export schedule or to enable it to run. The name of the export file and the name of the user who last modified the file show in the Document Exports pane.
Note: If the export has never run successfully, the Last Run indicator shows "N/A".
-
Click Settings & Tools > Tools, and then click Data Exports.
-
Expand the Document Exports pane, and then click the name of the export file.

-
Make any needed edits.

-
Click Save. The next scheduled export will run with the newly saved settings.
Delete a document export file
If you do not want to retain the saved export file, you can delete it.
-
Click Settings & Tools > Tools, and then click Data Exports.
-
Expand the Document Exports pane, click
 , and then click Yes to confirm.