Basic Document Importing
If you have digital copies of documents that you now want to track in Policy & Procedure Management, you can import them. The more you prepare before starting an import, the less confusion and the less manipulation of documents there will be after the import.
Preparing to Import Documents
Consider the following guidelines before importing documents:
- Document grouping. Your organization's documents may already be grouped by certain criteria, such as by department or by the documents' owners. You should prepare to import your documents by document owner and then import the documents of each document owner separately.
- Site, template, document owner. When you set up a document import, you must specify the site, the document owner, and the documents' template. These entities must exist in Policy & Procedure Management before you can assign them to imported documents.
Note: If some of an owner's documents will require a different template than others, you can further group the documents by template, or you can assign the same template to all of the documents and then change the template assignments as necessary using Bulk Edit.
- Bulk Edit. If you have multiple documents to import at once you can use Bulk Edit to assign document properties to multiple documents at once.
- Department assignments. Upon import, documents are assigned to the selected document owner's department. You can change the department assignment later, if necessary, using Bulk Edit.
Performing the Document Import
- Click Settings & Tools > Content Setup, and then click Import Documents.
- In the Step 1 pane, do either of the following:
- Click Browse. Find and select files, click Open, and then click Upload.
- In Windows Explorer, find and select the files you want to upload. Click and drag the files to the Drop file(s) here box and then, when you see the area highlighted in green, drop the files.
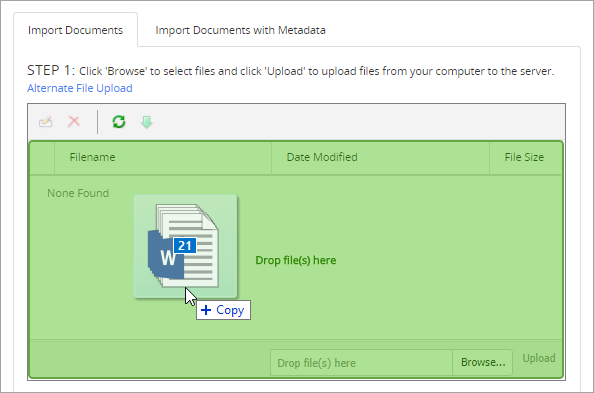
Note: The files do not actually import into the Policy & Procedure Management database until you click Import Documents.
- Once the selected files have been uploaded, they display in the file list. You now need to select certain properties that will be assigned to the documents upon import.
- In the Step 2 pane, for Owner, select a name.
Note: The imported documents will be placed in the owner's primary site and department.
- Select a template.
- If you are importing Word documents, you have the option of replacing headers and footers in the import files with those from the template. Select one or both of the following:
Replace the headers in the imported documents with the headers from the selected template.
Replace the footers in the imported documents with the footers from the selected template.
Important: If the template headers or footers are a different size than those in the import files, the page layout and pagination of the imported files will be affected.
- To include instructions for the owner about what to do with the imported documents, select Create task for owner, click Write task instructions here, type instructions, and then click Close.
- Click Import Documents.
- In the Alert box, do one of the following:
To view the progress of the import, click View Document Imports, and then click Close.
Click OK.
Viewing Import Status Reports
- In the Import Documents tab, click View Document Imports at any time to check import status.
- Click an import name to view the status of the individual documents of the import. If an issue exists with a specific document, the problem is described in the Results column.
- Click Close twice.
Finding Newly Imported Documents
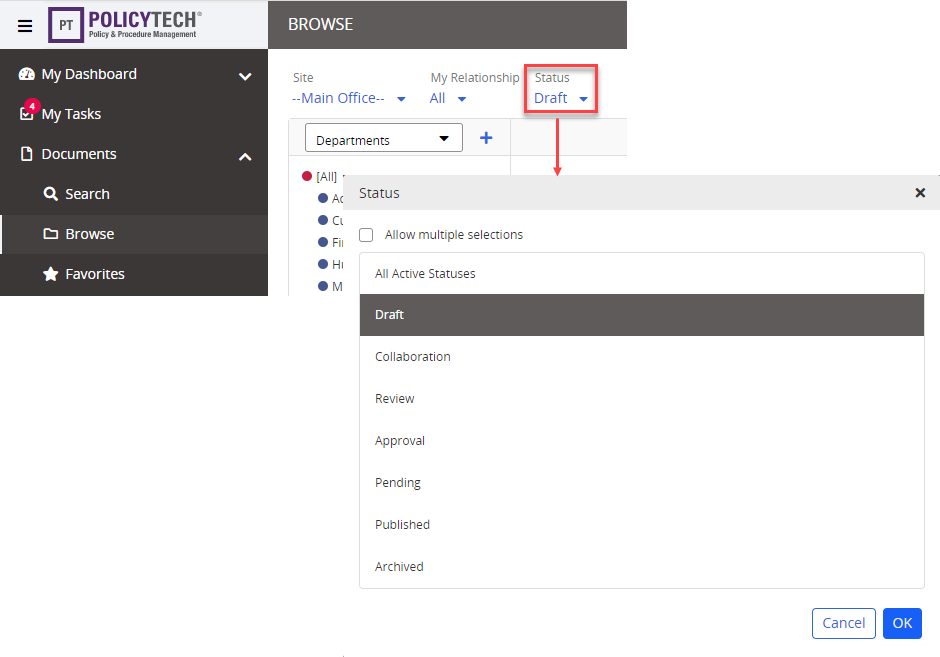
- In the navigation pane, click Documents, and then click Browse.
- In the Browse pane, in the Status list, click Draft, and then click OK.
- In the Arrange by field, click Document Owner, and then click OK.
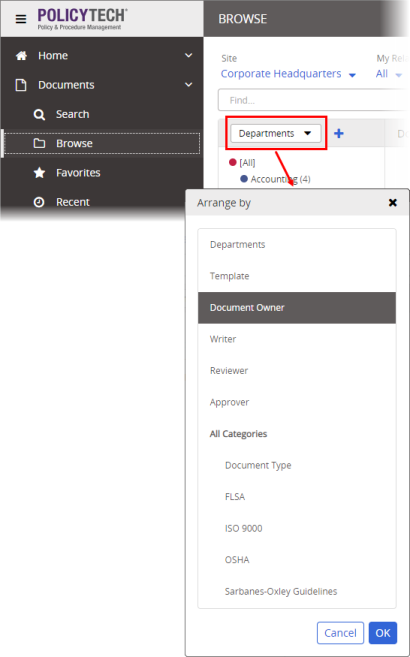
- Click the name of the document owner assigned to the newly imported documents.
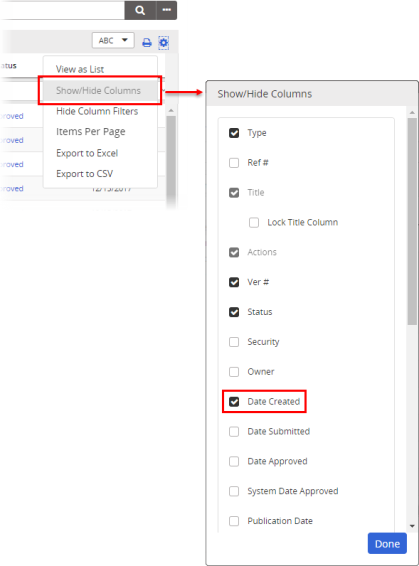
- Click
 , and then click Show/Hide Columns.
 - Select the Date Created column, and then click Done.
- In the document list, click the Date Created column twice—once to sort the list by creation date and again to reverse the sort order and display the most recently created documents at the top of the list.
This publication was written and produced at NAVEX Global, Inc., Lake Oswego, Oregon. This publication or any portion thereof is confidential and/or proprietary and may not be reproduced or used in any manner whatsoever without the express written permission of NAVEX Global, Inc.
Copyright © 2026 NAVEX Global, Inc. NAVEX Global® is a registered trademark/service mark of NAVEX Global, Inc. The NAVEX Global® logo is a trademark/service mark of NAVEX Global, Inc. Unauthorized use of NAVEX Global, Inc.’s trademarks/service marks is strictly prohibited without prior written permission from NAVEX Global, Inc.