Importing Subcategories
You can import multiple levels of subcategories at once using an Excel spreadsheet.
Important: You must create and save the top-level category (see Adding a Category) before importing its subcategories.
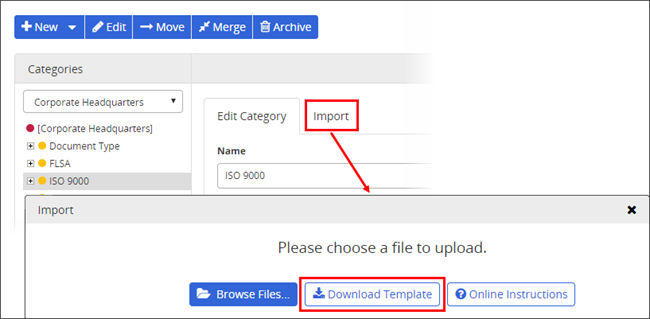
Import Subcategories
- Click Settings & Tools > Content Setup, and then click Categories.
- If multiple sites exist, select the site containing the category you want to add subcategories to.
- Select a category (the target category for the subcategory import).
- Click the Import tab, and then click Download Template.
- In the Confirm box, click Yes, if subcategories already exist under the current category and you want to make modifications to them (such as changing titles or adding descriptions) as part of the import or click No, if you do not want to include current subcategories in the download template. The file saves to your Downloads folder.
- Open the template and enable it for editing.
- Use the import template to list the subcategories that you want to import under the target category. See Prepare the Import Spreadsheet for guidelines to add subcategories to the template.
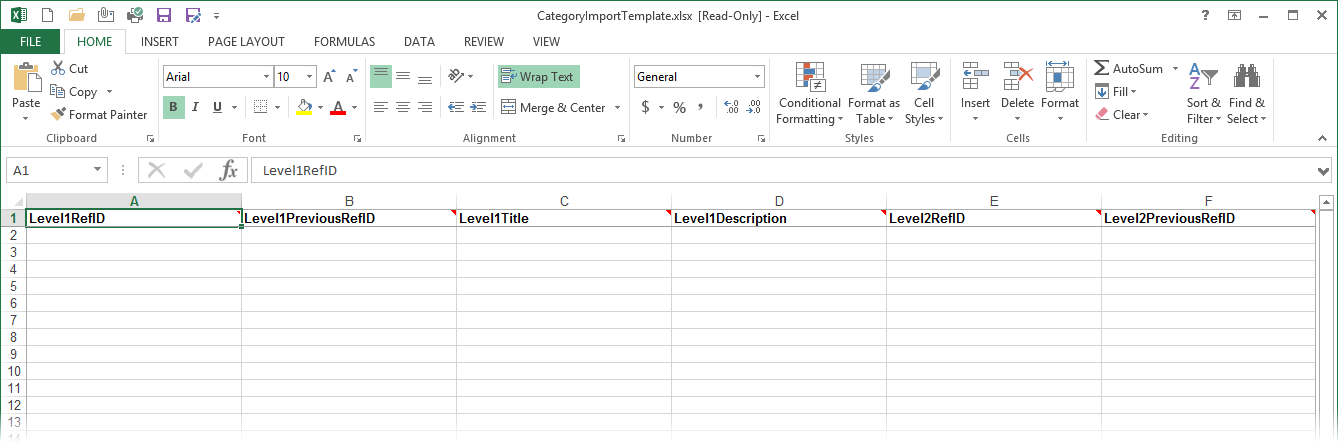
 Prepare the Import Spreadsheet
Follow these guidelines to construct a spreadsheet for adding subcategories to the template.
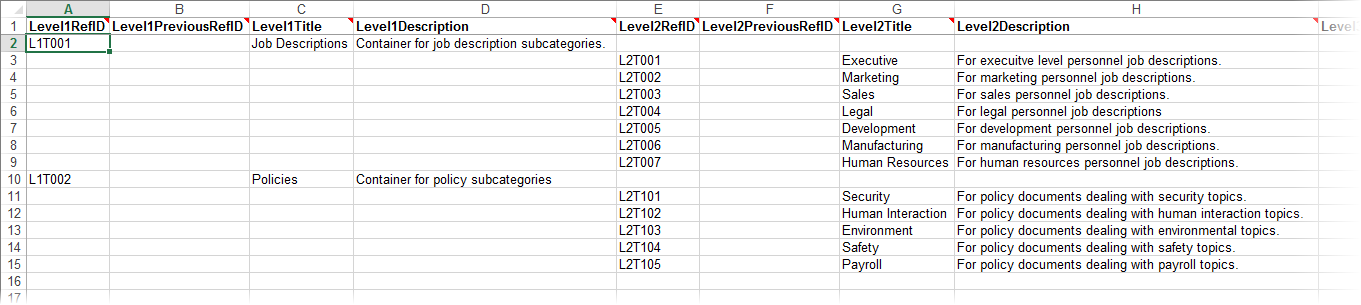
- List only one subcategory per row. The following is an example of a single level of subcategories to be imported under a top-level category called Document Type.

- Each subcategory entry can contain up to four pieces of data: the reference ID, the previous reference ID (used only for changing an existing reference ID to a new value), the title, and the description. Of these, only the reference ID is required for a successful import. (Because each subcategory must have a title in the Policy & Procedure Management system, the reference ID will also be used as the title if you leave the title field empty in the import template.)
- To change an existing category's reference ID, include the new reference ID in the Level[X]RefID column and the current reference ID in the Level[X]PreviousRefID column, as shown below. In this example, the reference IDs are currently the same as the subcategory titles and are being changed to alphanumerical codes.
Note: If you want to change reference IDs of existing subcategories using the import template, be sure to specify that you want existing subcategories included when downloading the template. You can then simply cut and paste the values from the Level[X]RefID column into the Level[X]PreviousRefID column.

- To import a lower level of subcategories, simply list them in the next set of columns to the right of and in the rows directly below their parent subcategory, as shown below.
Important: Be sure not to list a sub-subcategory on the same row as its parent subcategory.
- While the import template includes columns for three levels of subcategories, you can include however many levels you need. Simply copy a set of four subcategory columns to the columns on the right and increment the level numbers.
- List only one subcategory per row. The following is an example of a single level of subcategories to be imported under a top-level category called Document Type.
- Save the spreadsheet in .xlsx (Excel 2007 or later) format.
Important: The older .xls (Excel 97-2003) format is not supported.
- Back in Policy & Procedure Management, click Browse Files. Find, and select the import spreadsheet file, and then click Open.

Note: If the Import tab for the top-level category no longer displays, click Settings & Tools > Content Setup, click Categories, click the category, and then click the Import tab.
After uploading and analyzing the file, Policy & Procedure Management displays the number of issues found.

- If there are issues, click Review Issues, and then see Handling Import Issues for details on interpreting the spreadsheet and fixing issues to upload it again.
The table below lists the issue levels and a definition for each.
| Level | Description |
|---|---|
| Critical (red) | The spreadsheet is missing information or is invalid and cannot be imported. |
| Medium (orange) | The spreadsheet contains information that cannot be imported as it is but that will not cause the import to fail. If you continue with the import, the defective information will either be ignored, replaced with a valid value, or truncated (if the data exceeds the character limit). |
| Low (yellow) |
The spreadsheet contain a piece of information or is lacking optional information you may want to check before continuing with the import. |
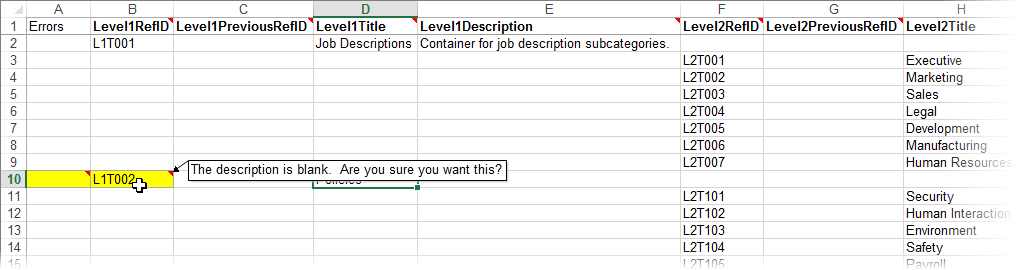
- Open the issues spreadsheet.
- In the Errors column (column A) look for any cells with a fill color (red, orange, or yellow), which indicates that there is a possible issue with the information in that row. Look across in that row for other colored cells, and then point to a colored cell to display the error detail.
Important: Be sure to scan the entire row for colored cells as there may be multiple issues with the same subcategory.
- Do one of the following:
- If you see issues to address, open the original import spreadsheet you uploaded, and make the needed changes, then return back to Policy & Procedure Management.
- If there are no critical issues and you do not feel you need to make any changes to correct medium or low issues, then return back to Policy & Procedure Management.
Important: Do not make changes directly in the issues (ReviewIssues.xlsx) spreadsheet. Make needed changes in your original import spreadsheet using the information in issues spreadsheet as a guide.
- Back in the Import tab, click Start Over.

-
Click Browse Files. Find, and select the import spreadsheet file, and then click Open.
-
Do one of the following:
-
If there are still issues, click Review Issues, open the issues spreadsheet, and repeat the steps above until you are comfortable with the import spreadsheet contents.
-
If there are no critical issues and you do not feel you need to make any changes to correct medium or low issues, then return back to Policy & Procedure Management.
-
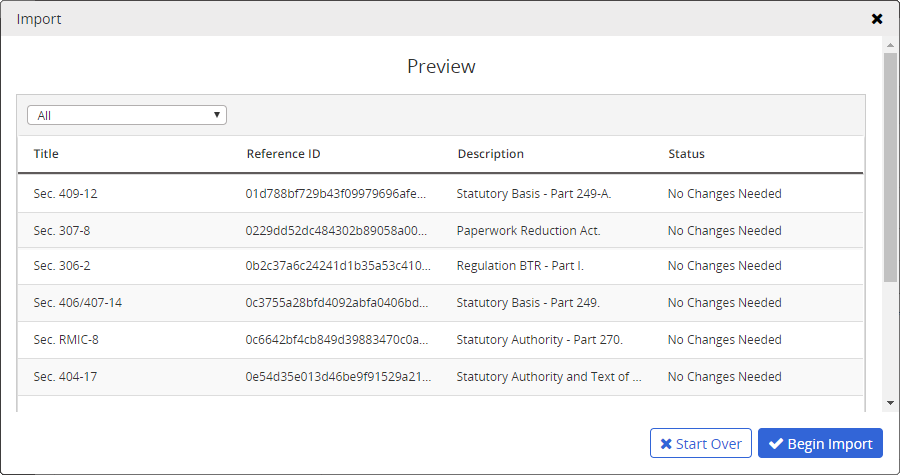
- Click Preview / Begin Import.

The preview lists the detail and status (Added or Changed) of the categories from the uploaded import file.
- Click Begin Import.
- In the category tree on the left, expand the top-level target category to see the imported subcategories.
This publication was written and produced at NAVEX Global, Inc., Lake Oswego, Oregon. This publication or any portion thereof is confidential and/or proprietary and may not be reproduced or used in any manner whatsoever without the express written permission of NAVEX Global, Inc.
Copyright © 2026 NAVEX Global, Inc. NAVEX Global® is a registered trademark/service mark of NAVEX Global, Inc. The NAVEX Global® logo is a trademark/service mark of NAVEX Global, Inc. Unauthorized use of NAVEX Global, Inc.’s trademarks/service marks is strictly prohibited without prior written permission from NAVEX Global, Inc.