Modifying Properties of the Bulk Editor
The properties page of the Bulk Editor appears much like the Properties Wizard owners use while creating content items. You can make changes in any number of the steps, but you must apply the changes in one step before moving on to another. The workflow steps and the options within each step vary depending on the currently selected content type.
Modify Properties of the Bulk Editor
- From the Bulk Editor page, on the Modify Properties tab, choose any of the steps as desired.
- In the Settings step, change any of the Basic Settings (such as the owner or template assignment), the Advanced Settings (such as the review interval, content effective date, or archive date), Custom Content Attributes (such as any the custom content attribute fields that have been created), or the Assignee Task Settings (such as the task details and instructions, estimated time to complete, or assigned by and must complete by text), and then click Apply Changes.
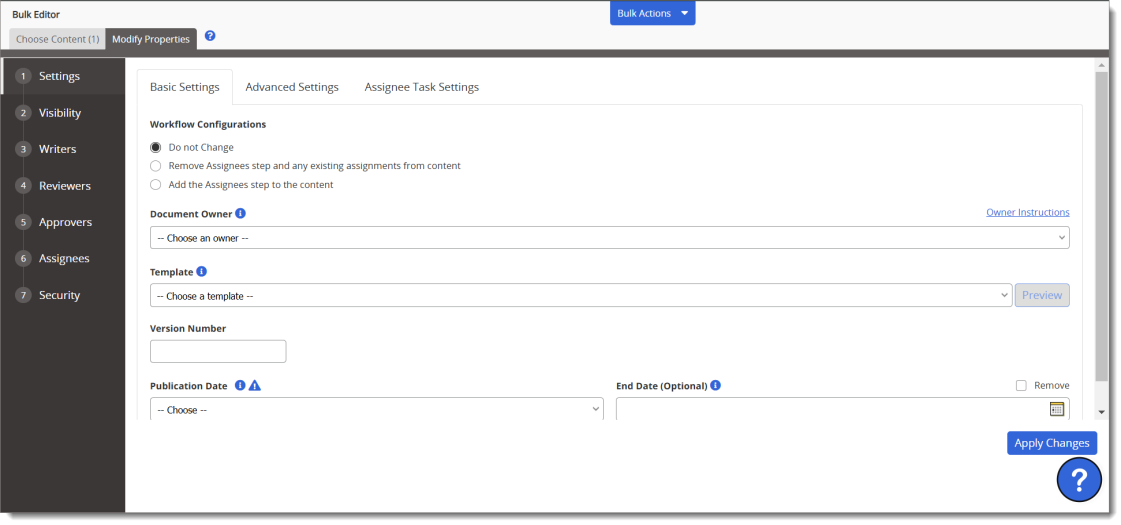
The Workflow Configurations options in the basic settings correlate with the Don't allow assignees option in the Template Setup step of the document template Properties Wizard (instead of the Settings step of the document Properties Wizard). These options let you add or remove the Assignees step in the selected documents regardless of their current template assignments and without having to reapply any other properties. The Workflow Configurations options only apply to documents and are not available when the Assessments or Campaigns content type is selected.
The Reapply Template Properties option is available only if it has been enabled. If you have a need for this feature, contact NAVEX Customer Support by submitting a request in the Community. Under Reapply Template Properties, click Properties to Reapply, and then select Reapply Template Headers, Reapply Template Footers, or both options. Click Close, and then click Apply Changes.
Note: Template headers and footers can only be reapplied to content items that are in Draft or Published status.
The Task Overview options in the Assignee Task Settings allow you to enable or disable the task overview information, including the owner's name, assigned date, and estimated time for task completion. This information is shown prior to the user completing the task. You can select the Do Not Change option to retain the current text for each selected content item.
The Name Entry Field and Assignee Task Comments options allow you to enable or disable these fields within the Sign & Complete section of a task. You can select the Do Not Change option to retain the existing selections for each selected content item.
For all other applicable sections of the Assignee Task Settings tab, you can do the following:
Select the Use Default check box to apply the default text in the applicable sections of the chosen content items.
Select the Remove check box to delete all existing entries in the applicable sections of the chosen content items.
Note: Entering text in the designated fields and selecting Apply overwrites any default or existing text within the chosen content item.
For the Custom Content Attribute tab, you can do the following:
Select an existing value from the desired field, and select - Remove from Selected Content to remove that value from the selected content items.
Select a new value from the desired field, and select + Add to Selected Content to update and add the new value to all the selected content items. For multiple value fields, new values are added to the existing list. For single value fields, the existing value is replaced with the new value.
Note: If a custom content attribute field is Locked at the template level, the values associated with that field cannot be modified.
- In the Visibility step, you can choose where to make the content visible. Click the Sites and Departments group or the Categories group, select one or more available options, click OK, and then click Remove from Selected Content or Add to Selected Content.
Important: When created, a content item must be assigned to at least one site (it is assigned to the owner's primary site by default). When removing site access using Bulk Edit, if the sites you select would result in all currently assigned sites being removed from a selected item, the removal will fail for that item and you will see a message to that effect in the Bulk Edit Results window.

- In the Writers, Reviewers, or Approvers steps, adding or removing writers, reviewers, or approvers is a bit more complex than other Bulk Editor changes, because these types of users can be assigned to different writing, review, or approval levels.
If you are removing writer, reviewer, or approver assignments, you do not need to know which level they are assigned to. Simply select users, job titles, or departments, and then click Remove from Selected Content. The selected entities will be removed from all levels to which they're currently assigned within the selected content items.
Important: Because all approved documents/assessments must have at least one assigned approver, attempting an action that would remove all approvers will fail. To switch an approver assignment, you may need to add the new approvers before removing existing ones.
If you are adding writer, reviewer, or approver assignments, you have several options for assigning to writing, review, or approval levels:
- Assign to a specific level: To assign entities to a specific writing, review, or approval level, in the Writers, Reviewers, or Approvers step, in the Selected Users box, use New Level to add the desired number of levels. For example, if you want to assign approval entities to Level 2, click New Level, and then, with Level 2 selected, choose approvers, job titles, or departments.
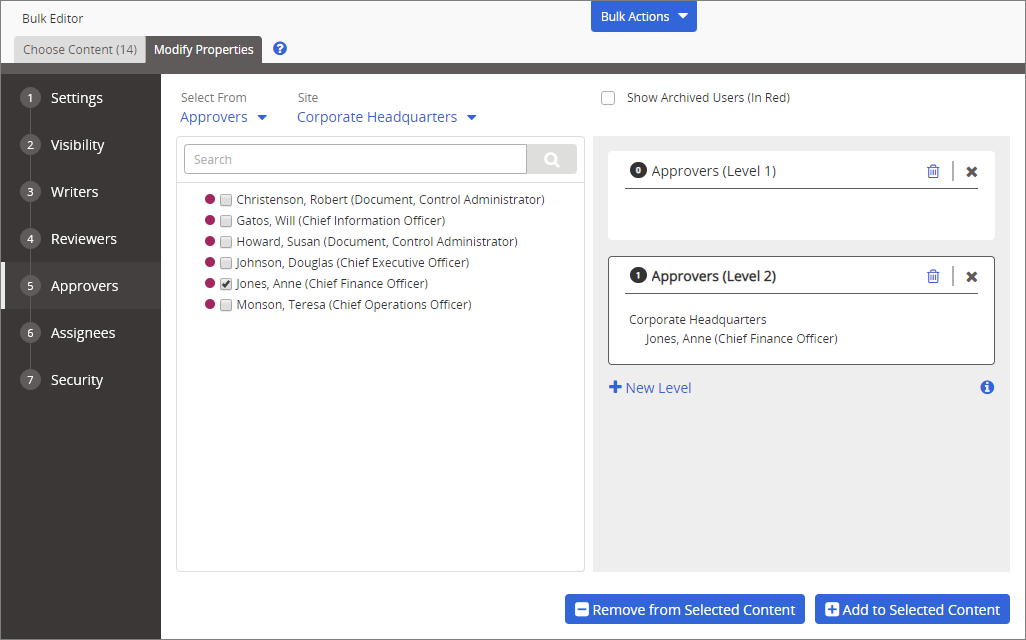
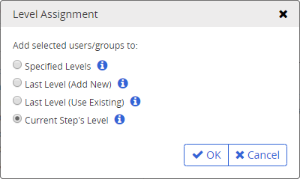
When finished selecting entities, click Add to Selected Content, in the prompt click Specified Levels, and then click OK.

- Assign to the last level: To assign entities to the last (greatest in number) level of the Writing, Review, or Approval step, select users, job titles, or departments (no need to add levels first), and then click Add to Selected Content to display the Level Assignment prompt. Either click Last Level (Add New) to create a new, last writing, review, or approval level and assign the selected entities to it, or click Last Level (Use Existing) to assign the selected entities to whatever is the already existing, last writing, review, or approval level; and then click OK.
- Assign to the current level in the current workflow status: Depending on your current document/assessment selection, you may be able to assign entities to whatever workflow step (Draft, Writers, Review, etc.) and level the selected documents/assessments are in. For this option to be available, the status of the selected documents/assessments and the currently selected step in Modify Properties must be the same.
For example, if you want to assign approvers to the current approval level, start in the Choose Content tab by selecting In Approval - Approval for Status and then selecting documents/assessments. Then, in the Modify Properties tab, select the Approvers step, and then select approvers, job titles, or departments.
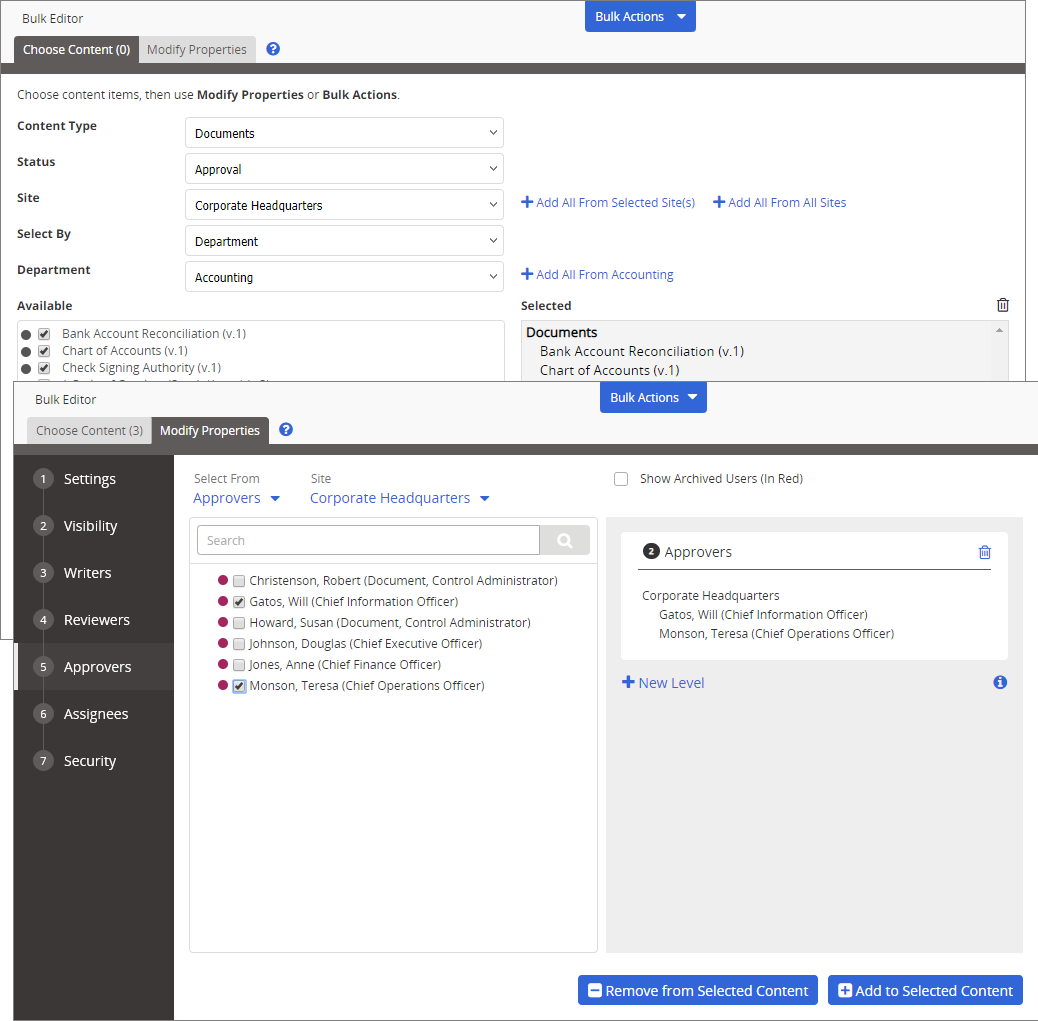
Then, click Add to Selected Content, in the prompt click Current Step's Level, and then click OK.
- Assign to a specific level: To assign entities to a specific writing, review, or approval level, in the Writers, Reviewers, or Approvers step, in the Selected Users box, use New Level to add the desired number of levels. For example, if you want to assign approval entities to Level 2, click New Level, and then, with Level 2 selected, choose approvers, job titles, or departments.
- In the Assignee step, you can add or remove required assignee task assignments, add or remove "Notify Only" assignments (documents only), or change the task or "Notify Only " status of existing assignee assignments (documents only).
- To remove an assignee designations, select departments, job titles, or assignees, and then click Remove from Selected Documents. If you are working with documents, each assignment will be removed regardless of whether it is a required task assignment or "Notify Only" assignment.
- To add a required task assignment (where assigned users must mark documents as read or complete an assessment), select departments, job titles, or assignees, and then click Add to Selected Documents.
- (For documents only) To add a "Notify Only" assignment (where assigned users are only notified that documents are available once they have been published and are not assigned reading tasks), select departments, job titles, or assignees, and then click Add as Notify Only.
- (For documents only) To change an existing assignee selection from a required task to "Notify Only," or vice versa, select departments, job titles, or assignees, and then select Modify Notify Only Status. Notice that the options at the bottom change when the Modify Notify Only Status option is selected.
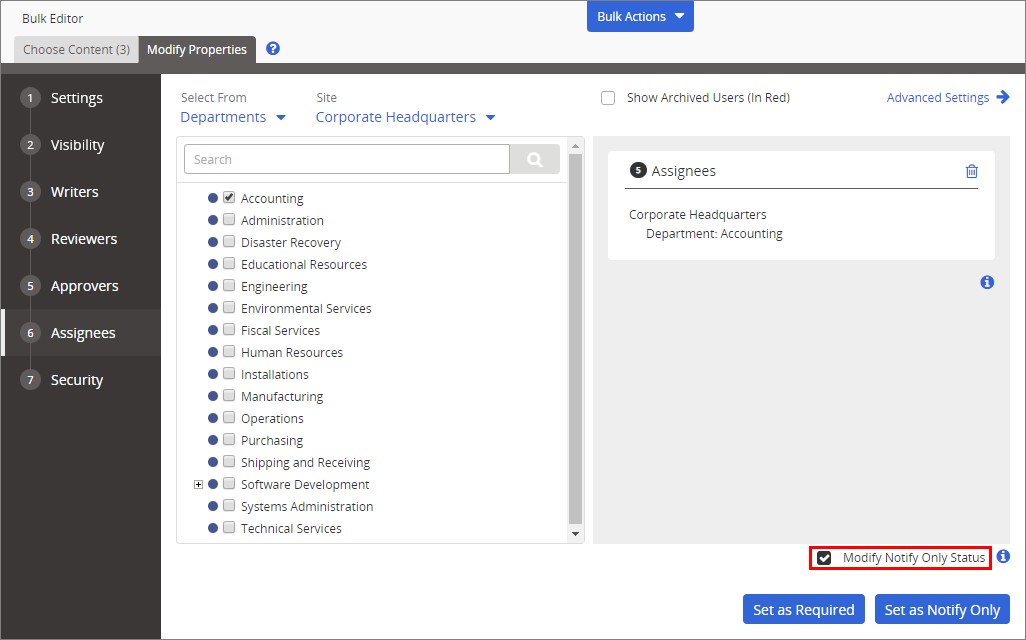
Select Set as Required to change "Notify Only" assignments to required reading task assignments, or select Set as Notify Only to change required task assignments to "Notify Only" assignments.
Important: With the Modify Notify Only Status option selected, the Set as Required and Set as Notify Only buttons only change existing assignments. These options DO NOT add the entities in the Selected Users box to the selected documents if the selected users are not already assigned.
In the Security step, select a different security level, and then click Apply Changes.
- In the Settings step, change any of the Basic Settings (such as the owner or template assignment), the Advanced Settings (such as the review interval, content effective date, or archive date), Custom Content Attributes (such as any the custom content attribute fields that have been created), or the Assignee Task Settings (such as the task details and instructions, estimated time to complete, or assigned by and must complete by text), and then click Apply Changes.
-
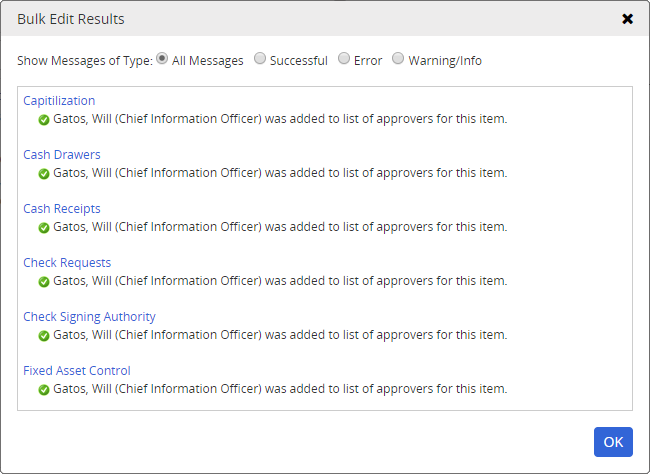
Each time you perform a Bulk Editor action, a results window displays. You can click a title to open and check your changes.
Note: All message types are shown by default. You can also choose to see only success or error messages or warnings.
-
Click OK to close the Bulk Edit Results window.
This publication was written and produced at NAVEX Global, Inc., Lake Oswego, Oregon. This publication or any portion thereof is confidential and/or proprietary and may not be reproduced or used in any manner whatsoever without the express written permission of NAVEX Global, Inc.
Copyright © 2026 NAVEX Global, Inc. NAVEX Global® is a registered trademark/service mark of NAVEX Global, Inc. The NAVEX Global® logo is a trademark/service mark of NAVEX Global, Inc. Unauthorized use of NAVEX Global, Inc.’s trademarks/service marks is strictly prohibited without prior written permission from NAVEX Global, Inc.