Viewing Approval after Publication Users
You can determine if a user has been added as an approver after publication and completed their task by reviewing the document Overview tab, the Task by Content - All Tasks report, and the Inserted Field Properties.
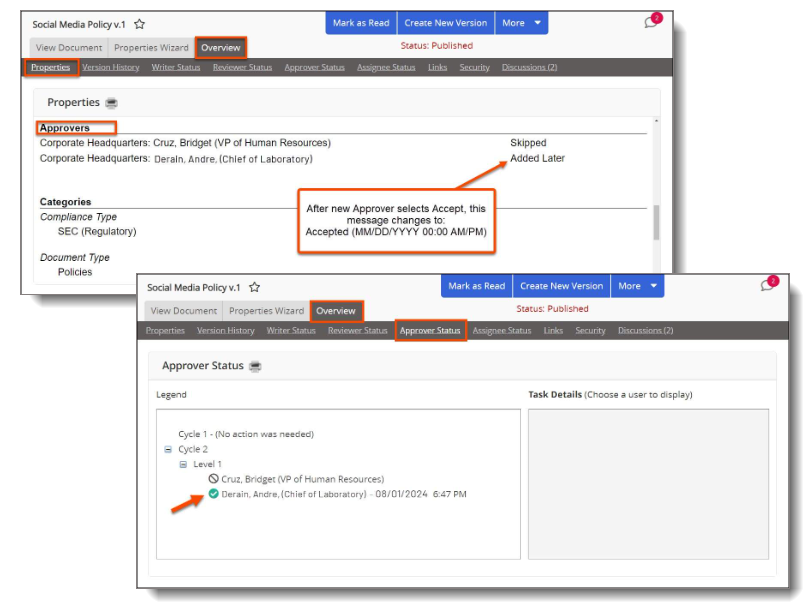
View using Overview
-
From an open a document, click the Overview tab to view the following information:
-
Under Properties, the new approver will appear as Added Later before approval, and as Accepted after approval.
-
After approval, the new approver will be added to the latest cycle and level under Approver Status.
View using task by Content-All Tasks report
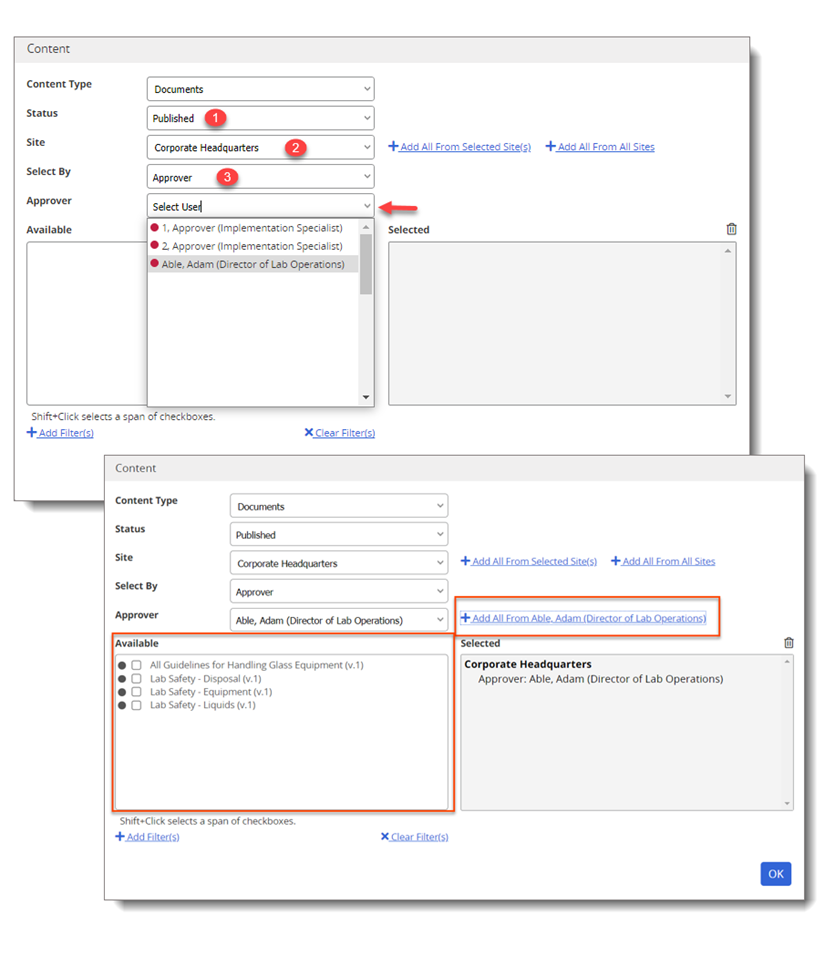
The Tasks by Content - All Tasks report displays information on when the Accept action was taken by the approver on the document.
-
In the navigation pane, click Reports, and then expand Tasks by Content (Documents, Assessments, Campaigns).
-
Click Tasks by Content - All Tasks.
-
In the Content page, do the following:
-
For Status, select Published to view the Published content.
-
For Site, select the appropriate site name.
-
For Selected By, select Approver to view the existing approver list.
-
In the Approver field list, select the desired approver.
-
In the Available box, you can select from the individual items or you can select all items at once by clicking +Add All From [Approver's name].
-
-
-
Click OK, and then click View Report.
-
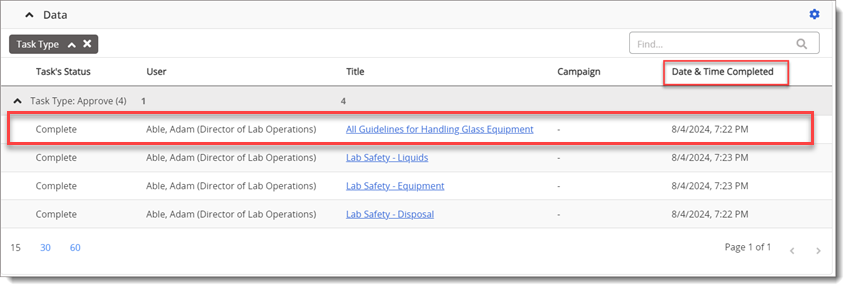
The Task Type: Approve field will display the user's approved documents.
-
-
In the Data pane, click
 , and then click Show/Hide Columns.
 -
Select Date & Time Completed, and then click Done.
-
The new Date & Time Completed column will be visible in the grid showing when the document was approved.
-
Viewing with Inserted Properties
Once the approver has completed the Accept action, the approver's name and date of approval will appear in the Inserted Properties under the Approver information.
Note: If a Document already has Inserted Properties for "Approved By" the information will automatically be updated to show the new Approver.
-
From within a document, place the cursor where you want to insert a field property.
-
In the PolicyTech Tools menu, expand Insert Properties.
-
In the list, expand a property group to view the various fields available, and then click the name of a field to insert it.
-
Click Save, and then click Back to PolicyTech.
This publication was written and produced at NAVEX Global, Inc., Lake Oswego, Oregon. This publication or any portion thereof is confidential and/or proprietary and may not be reproduced or used in any manner whatsoever without the express written permission of NAVEX Global, Inc.
Copyright © 2026 NAVEX Global, Inc. NAVEX Global® is a registered trademark/service mark of NAVEX Global, Inc. The NAVEX Global® logo is a trademark/service mark of NAVEX Global, Inc. Unauthorized use of NAVEX Global, Inc.’s trademarks/service marks is strictly prohibited without prior written permission from NAVEX Global, Inc.