Configuring UPS Active Directory Settings
You can use the User Provisioning Service's built-in Active Directory feature to have user sync files automatically generated. If necessary, consult with your IT specialist to get the required Active Directory information.
Note: If you are syncing user information from a database other than Active Directory, see Preparing a User or Department Sync File.
Configure UPS Active Directory Settings
- From the NAVEX User Provisioning Service menu, click the Active Directory tab.
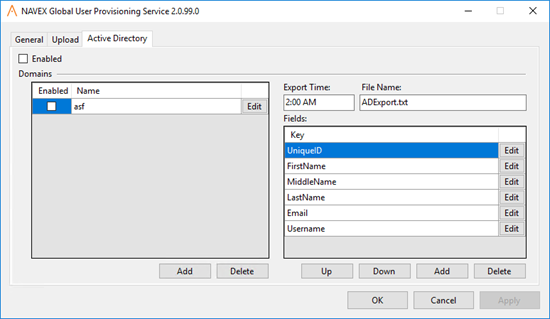
The default Export Time setting for pulling user information daily from Active Directory (AD) is 2:00 AM. If you change the time, be sure to use a time format that is valid for the computer's current Region and Language settings in Windows. For example, the default Short time setting for English (United States) is h:mm tt.
The default export File Name is ADExport.txt. If you change the file name, be sure to include the .txt extension.
- (Optional) In the Fields box. do any of the following:
Important: The Fields box lists default fields pulled from AD. The field names are specific to NAVEX applications. When you later add AD domains to User Provisioning Service, you can map these field names to AD attributes.
- To change a listed key to different one, click Edit, type the new key name, and then click OK.
- To remove a key from the list, click the key name, and then, below the list, click Delete.
- To add a field to export from AD, click Add, type a key name, and then click OK.
Note: It does not matter what key name you use. You will be mapping the key name to an AD attribute value when you add AD domains to User Provisioning Service.
- To change the key order, and thus the column order in the export file, click a key name, and then click Up or Down.
- Click Apply.
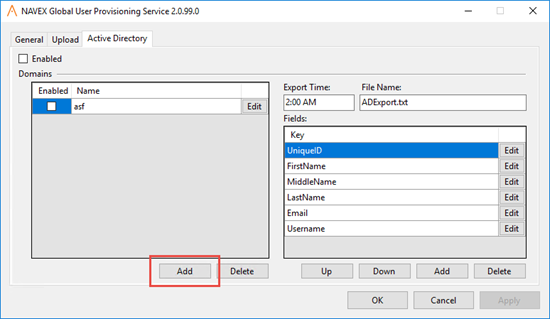
You now need to specify which AD domains you want user information pulled from. Add domains one at a time.
- In the Domains box, click Add.
- (Optional) The fields currently selected on the Active Directory tab automatically appear in the Domain Settings menu. If necessary, update the export fields for this domain by choosing a different output type or by clicking Edit and modifying the Key, Value, or Output Type text.
Notes:
- If you added a field, be sure to edit it in Domain Settings and type the corresponding AD attribute value.
- All domains must use the same export fields, so you cannot add or delete fields from within a Domain Settings menu.
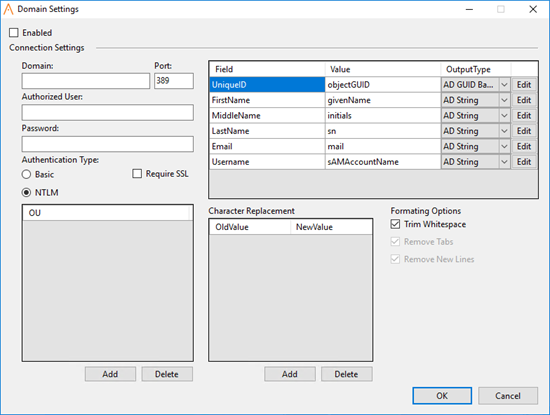
- Type values in the following fields:
- Domain (name)
- Port
- Authorized User
- Password
- For Authentication Type, click NTLM (NT LAN Manager) or Basic. If required by your IT specialist, select Require SSL (Secure Sockets Layer) for enhanced security.
- You must include at least one organizational unit (OU) from the domain. In the OU box, click Add.
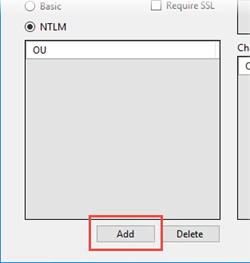
Note: Policy & Procedure Management is intentionally designed not to allow all users in a site to be archived at once. In other words, a sync attempt with an empty OU will fail. In the rare case where you need to archive all users in a site, you must leave at least one user in the OU and then manually archive that user after the sync.
- Type an OU name.

- (Optional) The default filter includes all active user objects from the domain. You can edit the filter to be more selective.
- (Optional) Include Child OUs is selected by default. Click to clear this option if you want only this OU included.
- Click OK.
- (Optional) You can use the Character Replacement feature to replace all instances of one character in AD user information with another character when that data is written to the export file. One reason you might want to do this is to standardize data text or formatting, such as replacing all em dashes with hyphens or replacing hyphens with colons.
- To add an entry, in the Character Replacement box, click Add. In the OldValue field, type or copy and paste a character, and then, in the NewValue field, type or copy and paste the replacement character.
- To delete an entry, click the OldValue or NewValue field, and then, in the Character Replacement box, click Delete.
- (Optional) You can use the Formatting Options feature to affect the export file contents.
- To delete all leading and trailing spaces from exported AD field text, select Trim Whitespace.
- Remove Tabs and Remove New Lines are preselected and cannot be changed. These formatting conventions prevent a tab or new line character within a field from being interpreted as a delimiter and splitting up data that should be contained in a single field.
- (Optional) Select Enable when you are ready for the domain settings to take effect.
- Click Apply.
This publication was written and produced at NAVEX Global, Inc., Lake Oswego, Oregon. This publication or any portion thereof is confidential and/or proprietary and may not be reproduced or used in any manner whatsoever without the express written permission of NAVEX Global, Inc.
Copyright © 2026 NAVEX Global, Inc. NAVEX Global® is a registered trademark/service mark of NAVEX Global, Inc. The NAVEX Global® logo is a trademark/service mark of NAVEX Global, Inc. Unauthorized use of NAVEX Global, Inc.’s trademarks/service marks is strictly prohibited without prior written permission from NAVEX Global, Inc.