Working with the Content Item Grid
By default, Search and Browse show content items in a grid (or table) consisting of rows and columns. You can customize the grid to meet your needs, such as adding or hiding columns, rearranging, and resizing columns, changing which columns the grid sorts by, and specifying the number of items (rows) to show per page.
Add or Remove Columns
- In a content item grid, click
 , and then click Show/Hide Columns.
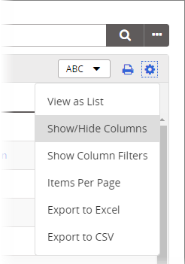
- In the Show/Hide Columns menu, do any of the following:
-
Select or clear a column name to show or hide that column
-
Select Lock Title Column to keep the Title column always visible on the left of the grid as you scroll from left to right.
Note: Lock Title Column locks both the Title and Type columns (if Type is currently displayed) and moves them to the far left of the grid. With Lock Title Column active, you can switch which of these columns is displayed first, but you cannot move either of them out of the first two column positions.
-
Click Reset Column Layout.
Note: This only resets which columns are displayed. It does not affect the current column positions or sizes.
- Click Done.
Arrange Columns and Change Sort Order
In a content item grid, do any of the following:
-
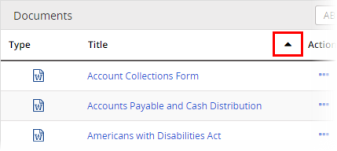
Change the sort order. Click the header of the current column to reverse the order from ascending to descending, or vice versa.
-
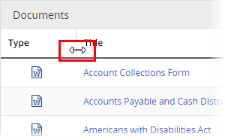
Adjust the column's width. Hover the pointer over the line between two column headers until the pointer changes to a two-headed arrow, and then click and drag the column separator.
-
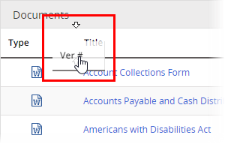
Move a column. Click and drag a column header over a column separator to display the placement arrows, and then drop the header into a different location.
-
Select a column to sort by. Click a column header to sort them by an item. An up or down arrow appears in the current column.
Change the Number of Items Displayed Per Page
- In a content item grid, click , and then click Items Per Page.
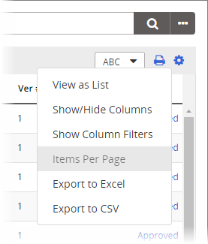
- Select 20, 50, 100, 250, or 500.
This publication was written and produced at NAVEX Global, Inc., Lake Oswego, Oregon. This publication or any portion thereof is confidential and/or proprietary and may not be reproduced or used in any manner whatsoever without the express written permission of NAVEX Global, Inc.
Copyright © 2026 NAVEX Global, Inc. NAVEX Global® is a registered trademark/service mark of NAVEX Global, Inc. The NAVEX Global® logo is a trademark/service mark of NAVEX Global, Inc. Unauthorized use of NAVEX Global, Inc.’s trademarks/service marks is strictly prohibited without prior written permission from NAVEX Global, Inc.