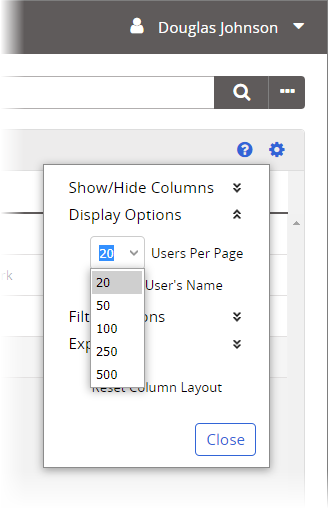
You can add or remove columns from the grid, rearrange and resize columns, and change which column the grid is sorted by. You can also specify how many users (rows) to show per page.
Note: The Roles, System Permissions, and Manager columns display shortcut View links. Click one of these links to go directly to the corresponding tab of a user's profile.
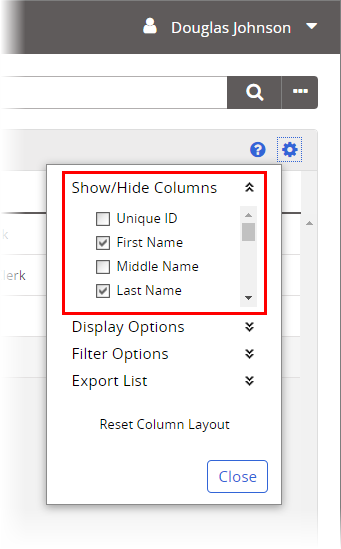
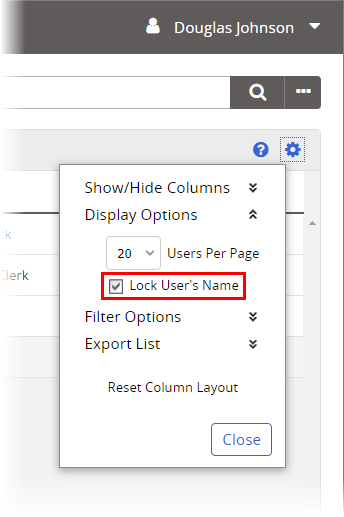
Note: To go back to the default user grid appearance, click ![]() , click Reset Column Layout, and then click Close.
, click Reset Column Layout, and then click Close.
In a user grid, do any of the following.
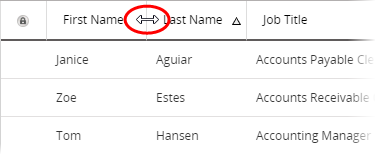
Adjust a column's width: Hover the pointer over the line between two column headers until the pointer changes to a two-headed arrow, and then click and drag the column separator.
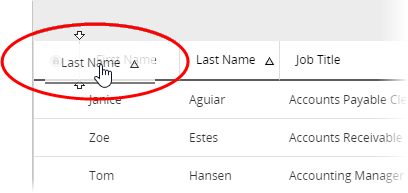
Move a column: Click and drag a column header over a column separator to display the placement arrows, and then drop the header.
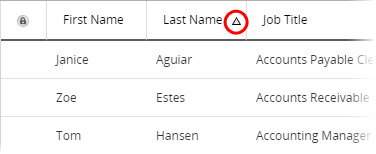
Select a column to sort by: Click a column header to sort the user list by that item. An up or down arrow appears in the current sort column.
Change the sort order: Click the header of the current sort column to reverse the sort order from ascending to descending, or vice versa.
Freeze the user name columns: Freezing (or locking) the user name columns (First Name, Middle Name, and Last Name) keeps those columns in place as you scroll to the right and left. If the name columns are not the first columns in the user list, freezing the user name columns will automatically move them there.