Template Setup Step for Campaigns
When you create a new campaign template, you see a screen similar to the one below with only the first step—Template Setup—of the Properties Wizard displayed.
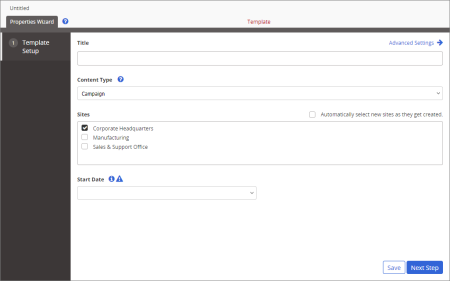
- Type a title.
- Because there is only one content type for campaign templates, the Content Type setting cannot be changed.
- If multiple sites exist, select those where you want this template available.
- (Optional) If this template is one you want all sites that might be created in the future to have access to, select Automatically select new sites as they get created.
- (Optional) By default, campaigns created from this template will be started (assigned to designated users for completion) as soon as they are approved. If needed, select Wait until specified date for Start Date. When creating a campaign from this template, the owner will then need to specify the start date (it cannot be preset in the template) or change the setting back to Start as soon as approved.
- Click Save.
Important: You must save the template at this point before you can access Advanced Settings and the other Properties Wizard steps.
You should now see all Properties Wizard steps included in the template, as shown below.
- (Optional) Click Advanced Settings, and then make adjustments as needed. See Advanced Settings: Template Setup Step for a Campaign Templatefor details.
- Do one of the following: