User Selection Options for User Groups
You can select which users are included in a group in any of the following ways.
|
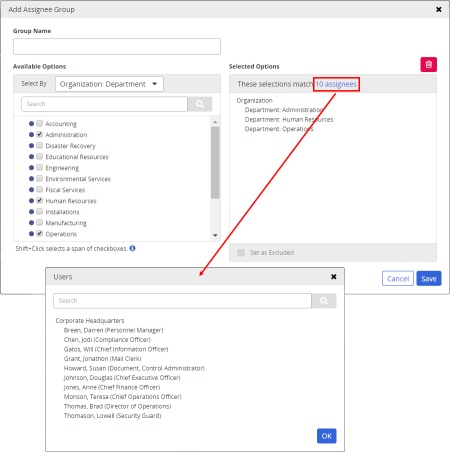
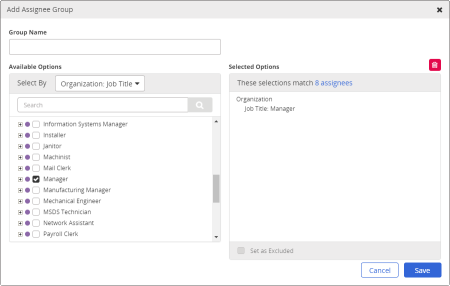
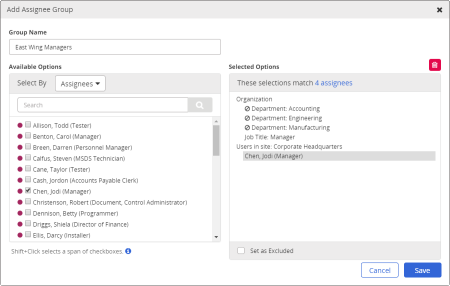
Important: In the header below Selected Options is the text These selections match [n] assignees. As you use the various methods of adding users to a group, you can always see the currently included individual users by clicking the [n] writers/reveiwers/approvers/assignees link in that text, as shown below. Use Search to find a specific user in a large list.
|
By Group Type Role
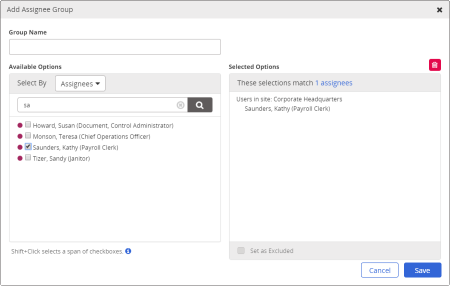
For Select By, select the role for the currently selected group type (Writers, Reviewers, Approvers, or Assignees), and then, in the resulting list, select users.
Note: If this is a multisite group, select a site before selecting users.
By Roles & Permissions
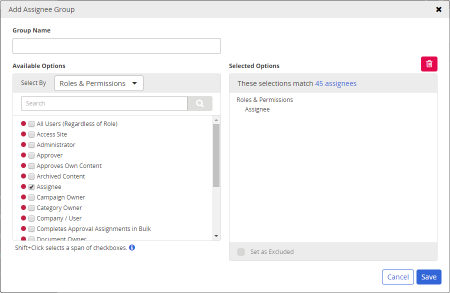
For Select By, select Roles & Permissions, and then make one or more selections to add all users assigned to the selected roles and permissions from all sites. For example, you can add all users who can be assigned to read documents or complete questionnaires by selecting the Assignee role.
Note: If you are creating a single-site group (you selected New Group to start), Roles & Permissions selections are restricted to those users assigned the selected role in the current site only. If you are creating a multisite group (you selected New Multi-Site (Global) Group to start), a Roles & Permissions selection includes all users assigned that role or permission from all sites. In other words, with multisite groups, you cannot select users assigned a certain role or permission by individual site.
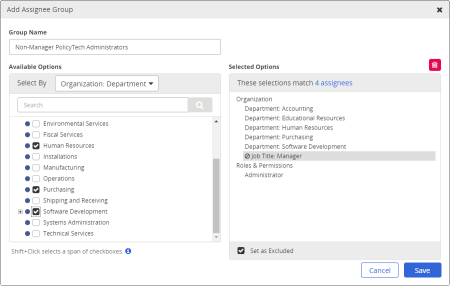
By Department
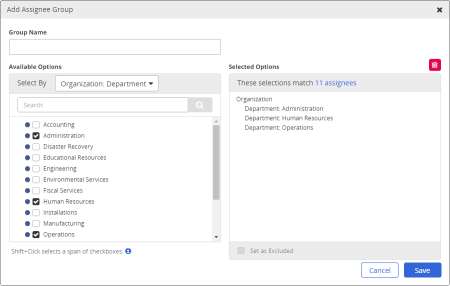
For Select By, select Organization: Department, and then make one or more selections to add all users assigned to the selected departments.
Note: If this is a multisite group, select a site before selecting departments.
By Job Title
For Select By, select Organization: Job Title, and then make one or more selections to add all users assigned to the selected job titles.
Note: If this is a multisite group, select a site before selecting job titles.
By Custom Attribute
If custom attributes have been added (see Custom Attributes), select a custom attribute, and then do one of the following, depending on what you see.
Important: Custom attribute selections apply to all users from all sites. This means that, if you are creating a single-site user group and select a custom attribute value to include, all users from ALL sites who are assigned that attribute value will be included in the single-site group.
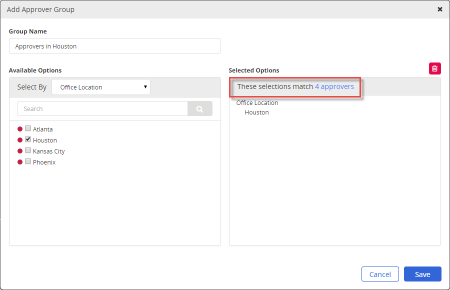
- If you see a list of attribute options, select one or more. The number of users assigned to the selected attribute values is shown in the list header on the right.
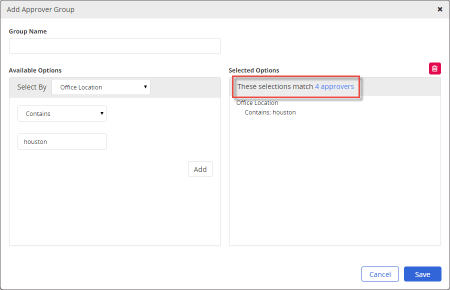
- If you see a set of options like the ones shown below, you can specify an assigned attribute by typing text that in some way matches an attribute value assigned to one or more users. Type some text that you know is in an attribute value, select how you want the text matched (Equals, Contains, Begins with, or Ends with), and then click Add. The number of users assigned to matching values for the selected attribute is shown in the list header on the right.
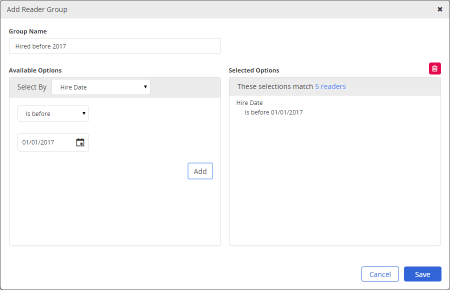
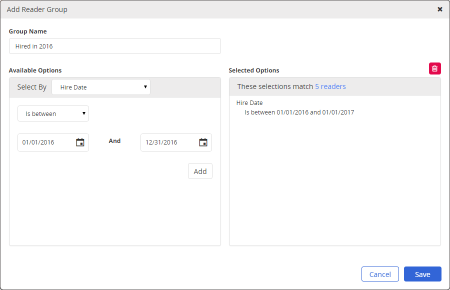
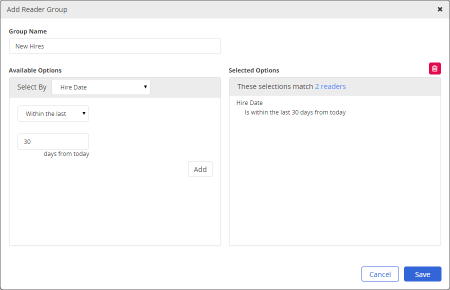
- If you see a set of options that include a Date selector, first select a date operator (Equals, Is before, Is after, Is between, Within the last).
If you selected Equals, Is before, or Is after, type a date, or click  and select a date, and then click Add. The number of users assigned to matching values for the selected attribute is shown in the list header on the right.
If you selected Is between, type or select start and end dates, and then click Add. The number of users assigned to matching values for the selected attribute is shown in the list header on the right.
If you selected Within the last, type a number of days to go back from today's date, and then click Add. The number of users assigned to matching values for the selected attribute is shown in the list header on the right.
By Exclusion
Before you exclude any selection, be sure to carefully read and understand the following exclusion rules. Then, follow the instructions under Setting an Exclusion.
Exclusion Rules
Rule 1
If a user is individually included or excluded (his or her user name appears in the Selected Options box), inclusions or exclusions by role, permission, department, job title, or custom attribute are ignored.
For example, suppose that the following are true:
- Jodi Chen is currently assigned to both the Manager job title and the Administration department.
- The Manager job title has been selected and thereby added to the Selected Options box
- The Administration department, among others, have been selected and thereby added to the Selected Options box, but have been set as excluded.
- The user name Jodi Chen has been selected and thereby added to the Selected Options box.
In this example, Jodi would be included in the group, because, although she is in an excluded department, she has been individually added as an included user.
For another example, suppose that the following are true:
- Douglas Johnson is currently assigned the Approver role.
- The Approver role has been selected and thereby added to the Selected Options box when creating a user group.
- The user name Douglas Johnson has been selected and thereby added to the Selected Options box, but has been set as excluded.
In this example, Douglas would be excluded, because, although he has an included role, he has been individually added as an excluded user.
Rule 2
If a user is a member of two or more selected sets (roles, permissions, departments, or job titles), and at least one of those sets is set as excluded, the user will be excluded from the group.
For example, suppose that the following are true:
- Anna Martinez is currently a member of the Administrator permission set, the Human Resources department set, and the Manager job title set.
- The Administrator permission, the Human Resources department, and the Manager job title have all been selected and thereby added to the Selected Options box.
- The Manager job title set has been set as excluded .
In this example, Anna would be excluded, because, although she is a member of both the Administrator permission set and the Human Resources department set, which are both included, she is also a member of the Manager job title set, which has been excluded.
Rule 3
If the Selected Options box lists exclusions only, all users except those individually excluded or excluded by virtue of membership in an excluded set, will be included in the group.
Important: Listing only exclusions could result in adding hundreds or thousands of users to the group. Be sure to look at the These selections match count in the header of the Selected Options list after setting exclusions to make sure you are not selecting more users than you intend.
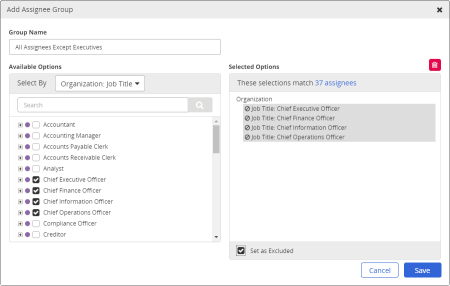
For example, suppose that the following are true:
- The Chief Executive Officer, Chief Financial Officer, Chief Information Officer, and Chief Operations Officer job titles have been selected and thereby added to the Selected Options box, and they have all been set as excluded.
- The excluded job titles are the only things listed in the Selected Options box.
In this example, the group would contain all users who are not assigned these job titles—everyone in the organization except those executives.
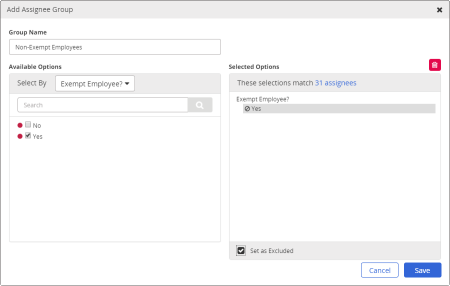
For another example, suppose that the following are true:
- The Exempt Employee? custom attribute set with a value of Yes includes all salaried employees.
- The Yes value for the Exempt Employee custom attribute has been selected and thereby added to the Selected Options box and has been set as excluded.
- The Exempt Employee? Yes value is the only thing listed in the Selected Options box.
In this example, the group would contain all users who are not assigned the Yes value for the Exempt Employee custom attribute (such as all hourly employees and interns).
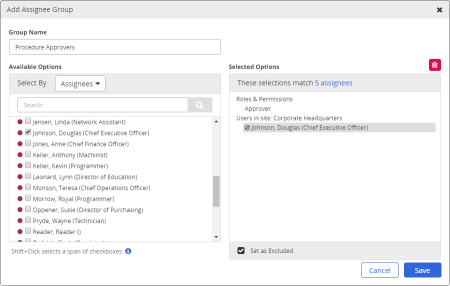
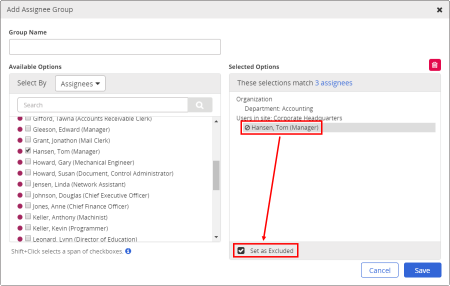
Setting an Exclusion
- Select a user, role, permission, department, job title, or custom attribute value.
Note: If you are creating a multisite user group, select a site before selecting an individual user, department, or job title.
- Click that item in the Selected Options box, and then click Set as Excluded.
Excluded selections are marked with  .
.