Assigning Sites, Departments, and Categories to a Document (Properties Wizard)
An important part of document creation is determining who should interact with the document you're creating. In this step of the Properties Wizard, you indicate in which sites and departments the document will be visible and in which categories it belongs.
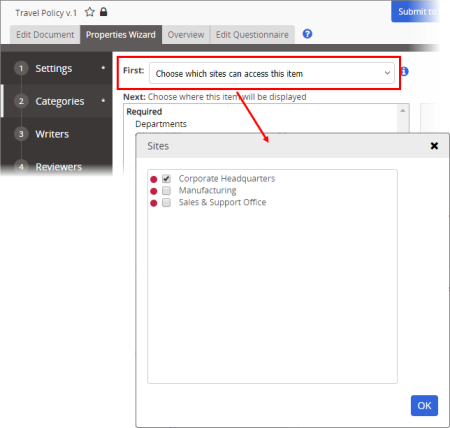
- Click Categories.
- If you have access to multiple sites, select the sites where this document will be visible, and then click OK.
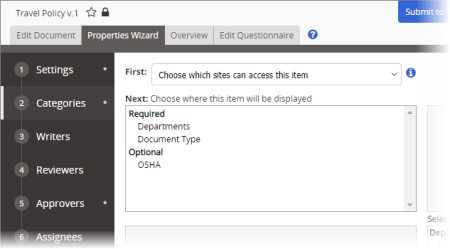
What you see in the Choose where this item will be displayed box depends on the template you assigned in the Settings step. You will always see Departments under the Required heading, but the template creator decides which categories, if any, should be required and optional. If your Choose where this item will be displayed box looked like the one in the example below, you would be required to choose a department and a Document Type category. You could also assign the document to an OSHA category if applicable, but wouldn't have to.
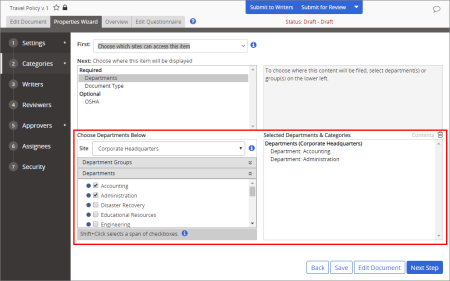
- In the Choose where this item will be displayed box, click Departments.
- Do one of the following:
- If there is no option for selecting a site in the Choose Departments Below box, simply select the departments that will have access to this document.
- If you have access to more than one site and chose to make this document available to more than one of those sites in step 1 above, then, in the Choose Departments Below box, select a site, and then select the departments that will have access. Repeat this step as necessary for other sites.
Important: You must select at least one department within at least one site. If you select multiple sites and do not select a department within one or more of those sites, this document will still be available on those sites but will be listed under Unfiled when arranging by department in Browse.
|
Notes:
- The assigned owner's site and department are selected by default when a new document is created.
- You can click a department name to see the users in the department.
- A department group is a combination of two or more departments from one or more sites. If desired, click Department Groups, and then select a department group or click the group name and select departments from within the group.
|
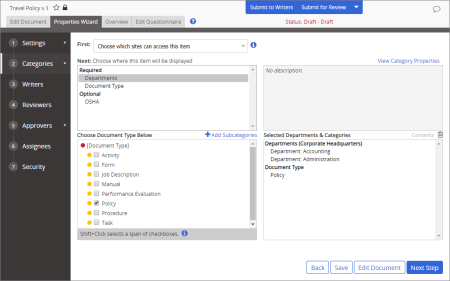
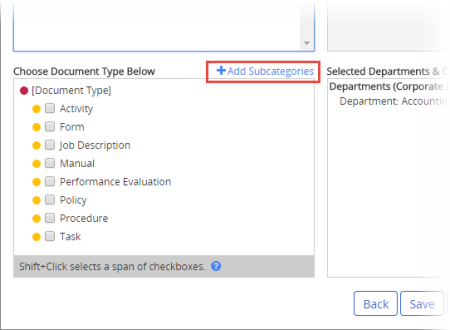
- If a category is listed under Required, click it, and then select one or more subcategories.
|
Notes:
- Some categories allow only one subcategory selection, while others allow multiple selections.
- If the current category allows the creation of new subcategories, Add Subcategories appears above the category list box, as shown below. See Adding a Subcategory for details.
|
- (Optional) If one or more categories is listed under Optional, click each category, and then select one or more subcategories for each.
- Click Save.
- Do one of the following:
- To continue with assigning properties, click Next Step, and then go to Assigning Writers to a Document.
- Click Edit Document, and then go to Writing a Document.
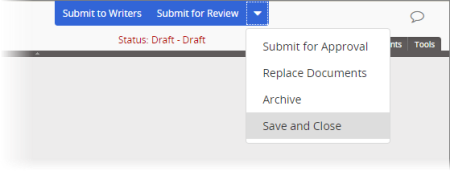
- To stop assigning properties and finish later, click
 to the right of Submit for Review, and then click Save and Close. (When you are ready to continue with assigning properties, go to Editing a Draft Document.)