Working with Levels
When, in the Properties Wizard, you assign writers, reviewers, and approvers to a document, you can create levels to specify which users get the document first, second, and so on. When you create multiple levels, all users on the first level must complete their tasks, such as reviewing the document, before the same task can be sent to the users at the next level.
The following instructions assume that you are currently working on one of these Properties Wizard steps: 3. Collaboration, 4. Review, 5. Approval.
- To add a level, do one of the following:
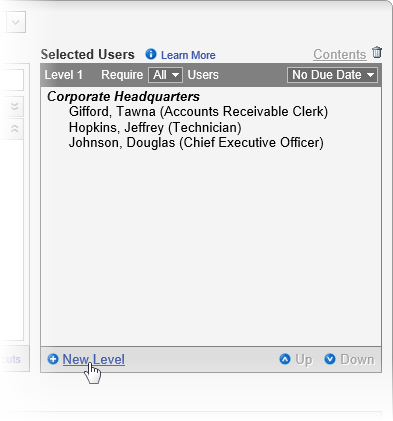
- At the bottom of the Selected Users box, click New Level.
- Click a user's name, and then click Down until a new level appears.
Notice in the screenshots above that a black Level 2 heading appears. The black color indicates that this level is now active. Any additional users selected at this point are added to Level 2. To make Level 1 active again, click the Level 1 heading.
- Do one of the following to put selected users in a level:
- Click a level heading to activate that level, and then select the users by department, job title, or role for that level.
- Click a user already listed in the Selected Users box, and then use Up or Down to move the user to a different level.
Note: Clicking Down when the user is already at the last level (highest numerically) automatically creates a new level.
- (Optional) In a level heading, click the Require box, and then click All or a number. This indicates how many users within each level must complete their tasks before the document can move to the next level. For example, if there are two users on a specific reviewers level, and you only need one or the other to review the document, you would select 1 in the Require list for that level.
- (Optional) In a level heading, click the No Due Date box, and then select a due date for that level. See Setting Due Dates for Writing, Reviewing, Approving, and Reading Tasks for detailed instructions.
