Prepare and Import a Questionnaire Translation File
- Find and open the questionnaire translation file that the master document owner sent or gave you access to.
Note: The name of a questionnaire translation file (a Microsoft® Excel® file) is in the following format: [document ID]_[language code]_QuestionaireForTranslationExportFiles_[year, month, hour, minute, second].xls. For example:371_fr-FR_QuestionaireExportForTranslationFile_2014_09_30_10_06_40.xls.
The contents of the file will look similar to the those shown below.
- In the Translation (Edit This) column, type the translations for or modifications of the text in the Current Text (Do Not Edit) column. To use a piece of current text as it is, leave its corresponding translation cell empty.
Note: The spreadsheet is protected so that you don't accidentally make changes to the text in the first two columns.
- When you're finished adding translations or modifications, save the file.
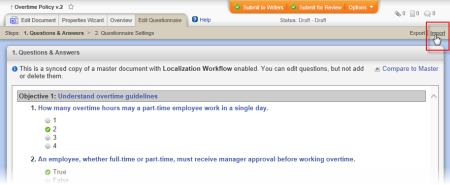
- Open the localized copy with the questionnaire that corresponds with the translation file you prepared.
- Click Edit Questionnaire, and then, near the upper right corner of the window, click Import.
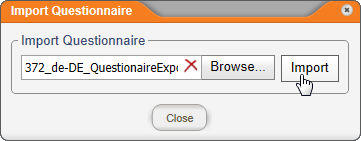
- Click Browse, find and click the translation file, and then click Open to add the file name to the Import Questionnaire box.
- Click Import, and then, when the process has finished, click OK.
Note: If you ever need to modify the imported text, you can either change it directly in the Edit Questionnaire tab, or you can export it using the Export option in the localized copy, make the needed changes, and then re-import it.