PolicyTech™ turns on Track Changes whenever a reviewer or approver chooses to revise a Word document. Track Changes marks all text changes, including insertions, deletions, moved text, and formatting changes. Reviewers and approvers can also insert comments to explain marked up text or to identify other changes that need to be made.
Note: Reviewers and approvers cannot turn off Track Changes while revising a document.
The screenshot below shows what marked-up text looks like. If multiple reviewers or approvers revised the document, each reviser's changes appear in a different color. You'll want to take action on each change by accepting or rejecting it so that no marked-up text remains when you resubmit the document for review or approval.
The location and appearance of the Track Changes and Comments options vary depending on the version of Word you're using.
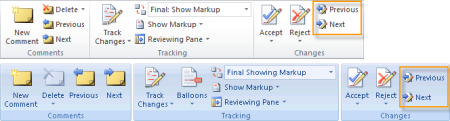
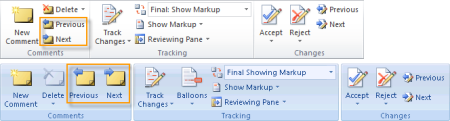
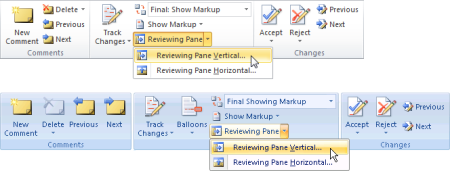
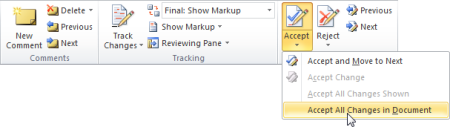
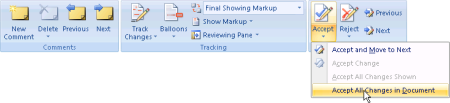
Comments, Tracking, and Changes groups on the ribbon's Review tab
Comments, Tracking, and Changes groups on the ribbon's Review tab
Using the Track Changes and Comments options, you can do any of the following:
Note: We recommend using the Track Changes tools to find marked-up text in the document as some very small changes (such as adding a period) may be missed otherwise.
After finding marked-up text, hover the cursor over the change to see who made it.
On the Review tab, in the Changes group, click Next or Previous.
On the Review tab, in the Comments group, click Next or Previous.
In the Reviewing Pane, you can see each markup in a categorized list and then click a markup to go to it in the document. You can also see who made each change.
On the Review tab, in the Tracking group, click the arrow next to Reviewing Pane, and then click Reviewing Pane Vertical or Reviewing Pane Horizontal.
Accepting a change removes the markup and leaves the normal text. Rejecting a change deletes the marked-up text.
Either select the changed text or place the cursor anywhere within or immediately before it. Then, on the Review tab, in the Changes group, click Accept or Reject.
On the Review tab, in the Changes group, click the arrow below Accept or Reject, and then click Accept All Changes in Document or Reject All Changes in Document.
On the Review tab, in the Tracking group, click the arrow next to Final: Show Markup, and then click Original.