Assigning Advanced Settings for a Document Template
When creating a document template there are additional advanced settings you can assign to the template.
Important: When creating a document using this template, an owner can change any of the following settings, unless you choose to lock the Enhanced Validation and Editing Document settings.
Assign Advanced Settings
-
From an open document template, click Advanced Settings.
-
For Review Interval, do one of the following:
-
Select No Review Date to never have a review interval.
-
Select Every [number] months from, change the number of months, and then in the second box, select a review date value from the options shown below:
approve/last reviewed date Sets the review date the number of specified months after the content item is approved for version 1 and after the previous review date for all subsequent versions. specified date Sets the review date the number of specified months after a specified date, which the owner will select when using this template for a new content item. -
To prevent users from bypassing periodic reviews and editing the Review Interval field on individual content items, select the Lock check box.
-
The Review Interval Lock takes effect immediately after it is selected and saved.
-
Once the Review Interval Lock is applied to a template, any existing documents using that template will have this field grayed out.
-
Note: Once a Template has been locked, there is no need to reapply it. Doing so can alter the Review Interval and other workflow settings for all existing documents that use that template.
When a review interval is set, any content item (document, assessment, or campaign) created from this template will come due for review after the specified interval has passed. The owner receives an email and Policy & Procedure Management task as the review date approaches.
Note: To change the default review interval for all new templates, see Default Content Properties.
-
-
-
For Warning Period, do one of the following:
-
Select Warn [n] months before Review Interval, and then type a number in the box.
-
Select Use Default Warning of [n] month(s) before Review Interval.
The owner and assigned proxy author will receive an email at the warning period indicating that the item will soon expire. The periodic review task will also begin at this designated warning period.
Note: To change the default warning period for all new templates, see Default Content Properties.
-
-
For Notification Settings for Owners & Proxies, do one of the following.
-
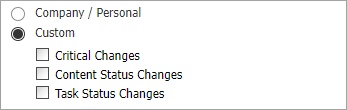
Select Company / Personal, to use the current Email Subscriptions settings of the assigned owner and proxy author to determine which email notifications relating to this document are sent.
Note: If the Allow users to manage their email settings option is currently selected (see Managing Email Settings), then the assigned owner and proxy author will receive only those notification emails that they have enabled in My Profile. If users are not allowed to manage their own email subscriptions, then the current Email Manager settings in the Email List tab determine which emails are sent.
-
Select Custom, and then select Critical Changes, Content Status Changes, or Task Status Changes. For details about the email notifications in these groups, see Email Notification Lists.
Important: You can lock the enabled/disabled setting for each email in the Critical Changes, Content Status Changes, and Task Status Changes groups (see Managing Email Lists). Changing the Custom setting for one of these categories in a template has no effect on individually locked emails.
-
-
When Enhanced Validation is enabled, a user is required to validate their identity either by entering a personal identification number (PIN) or by providing their username and password to complete a task such as marking a document as read, accepting a document in review, or approving a document.
For Enhanced Validation, click Yes or No. By default, for document owners using the template, the Enhanced Validation setting is hidden and locked. To change these settings, do one of the following:
-
To let document owners, see the Enhanced Validation setting but not change it, click to clear the Hide check box, and leave Lock selected.
-
To let document owners both see and change this setting, click to clear both the Hide and Lock check boxes.
-
-
For Available To, do one of the following:
-
Select Users With Owner Role, for any user assigned the Owner role (Document Owner, Assessment Owner, or Campaign Owner) that matches this template's content type will be able to see any content item created with this template while that item is in any workflow status (Draft, Collaboration, Review, Approval, Pending, and Published), but only if the item is associated with a site and department the owner has access to.
-
Select Custom Selection (Owners), for only those owners, besides the assigned owner, you specify can access the content that uses this template.
-
If you choose Custom Selection (Owners), click Select Users, and then select one or more of the owners within the currently selected site or sites.
Important: The other entities besides owners that you can assign have special properties. If you assign a job title, department, or department group, all owners, and only owners, with those job titles or within those departments will be given access to content created from this template. If owners are added to or removed from the selected job titles or departments, the access permissions are automatically updated.
- Under Select From, click
 , select Departments, Department Groups, or Job Titles, click OK, and then select one or more of the listed items.
-
-
For Mark as Read Text, do the following:
-
In the box, type text that users will see when they click Mark as Read. This text overrides the default text. Do not include any of the following characters in the text: | (vertical bar), < (less than symbol), ^ (caret).
-
Leave the box blank to use the default text. The default text a user will see when they click Mark as Read is shown below.
By marking this document as read, you are stating that you have read and understood the complete document. If you do not understand, click Cancel and contact your supervisor.
-
-
Click Custom Content Attributes, and then do the following:
-
Make any desired changes to the custom content attributes.
-
Select the check boxes to Hide, Lock or Require the attributes.
Note: Content owners must Reapply templates for any Required attributes to update within the content.
-
-
Click Save.
This publication was written and produced at NAVEX Global, Inc., Lake Oswego, Oregon. This publication or any portion thereof is confidential and/or proprietary and may not be reproduced or used in any manner whatsoever without the express written permission of NAVEX Global, Inc.
Copyright © 2026 NAVEX Global, Inc. NAVEX Global® is a registered trademark/service mark of NAVEX Global, Inc. The NAVEX Global® logo is a trademark/service mark of NAVEX Global, Inc. Unauthorized use of NAVEX Global, Inc.’s trademarks/service marks is strictly prohibited without prior written permission from NAVEX Global, Inc.