Assigning Assessment Template Properties
You assign properties to an assessment template through a series of steps.
Assign Assessment Template Properties
-
From an open assessment template, complete the following steps to assign properties to the template.
 1: Template Setup
The first step for assigning properties to a new assessment template is Template Setup.
-
On the Properties Wizard tab, do any of the following:
-
For Title, type a title for the new assessment template.
-
For Workflow Configurations, select one of the available options. The table below lists the workflow configuration options and a description of each one.
Full (Default) Enables the Writers, Reviewers, Approvers, and Assignee task assignment steps. Review / Approval Enables the Reviewers, Approvers, and Assignee task assignment steps. Approval Enables the Approvers and Assignees task assignment steps. Draft and Started / Published Enables only the Assignees task assignment step. This option is only avaialble if Policy & Procedure Management has been configured to allow it. -
Because there is only one content type for assessment templates, the Content Type setting cannot be changed.
-
If multiple sites exist, select those where you want this template available.
-
(Optional) If this template is one you want all sites that might be created in the future to have access to, select Automatically select new sites as they created.
-
(Optional) By default, assessments created from this template will be started (assigned to designated users for completion) as soon as they are approved. If needed, select Wait until specified date for Start Date. When creating an assessment from this template, the owner will then need to specify the start date (it cannot be preset in the template) or change the setting back to Start as soon as approved.
-
-
Click Save. You should now see all Properties Wizard steps included in the template.
-
(Optional) Click Advanced Settings, and then make changes as necessary. See Assigning Advanced Settings for an Assessment Template for detailed instructions.
-
Do one of the following:
-
Click Next Step to continue assigning properties.
-
Click Save.
-
2: Visibility
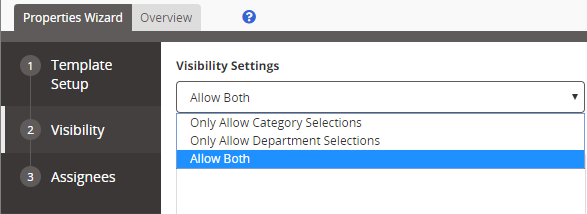
Use this step to choose whether to allow category or department selections only, or both when creating new campaigns using this template.
-
For Visibility Settings, select Only Allow Category Selections, Only Allow Department Selections or Allow Both.
Note: If you select Only Allow Category Selections, no department will be assigned to new assessments created from this template, and those assessments will appear under Unfiled when browsing by department.
- Do one of the following:
- If you selected Allow Both or Only Allow Category Selections for Visibility Settings, continue with step 3 below.
- If you selected Only Allow Department Selections, skip ahead to step 6 below.
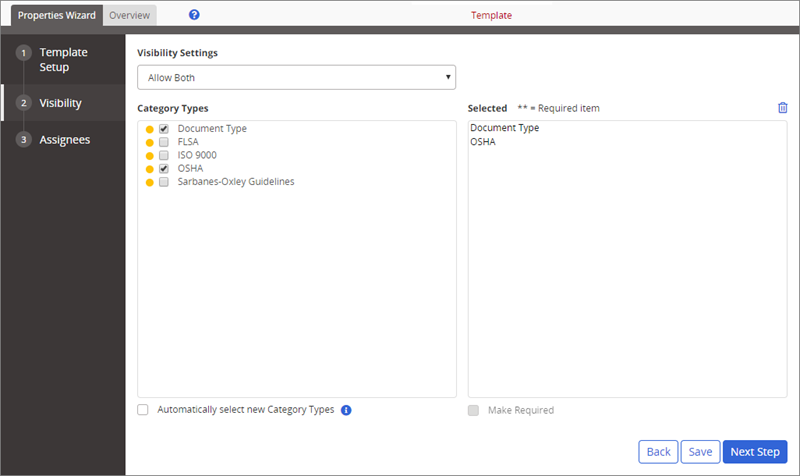
- Select one or more top-level categories.
Important: Selecting a top-level category enables an owner to create an item with this template to assign one or more subcategories from that category. If you select no categories, the owner will be unable to assign any subcategories.
Note: To remove a category type from the Selected box, click it, and then click
 .
.
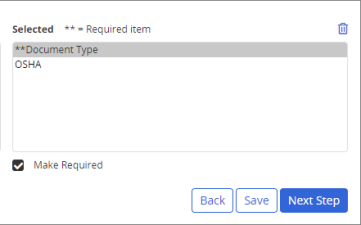
- By default, any categories you make available in the template are optional, meaning that owners can choose whether to select subcategories from the available categories. To make a category required—thus requiring a subcategory selection by the owner—click the category in the Selected box, and then select Make Required. (The two asterisks indicate that the category is required.)
- (Optional) Select Automatically select new Category Types if you want any category created in the future to be automatically added to this template as optional.
- Click Save.
- Do one of the following:
- Click Next Step, to continue assigning properties.
- Click Save.
3: Writers, 4: Reviewers, & 5: Approvers
Use this step to assign writers, reviewers, and approvers to the template.
-
Select one or more users. For detailed instructions on selecting by individual user, by group, by department, or by job title, see Selecting Users in a Template.
-
If multiple sites exist, select a site containing one or more users you want to assign.
-
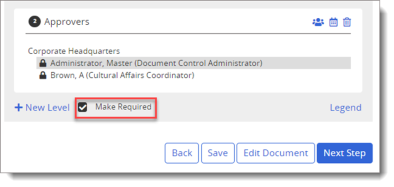
(Optional) To make a reviewer or approver required, click the selected user name, and then click Make Required.
-
You can also set a minimum number of reviewers or approvers of those assigned and have the assessment moved on as soon as that number of approvers or reviewers complete their tasks.
-
In the right pane where approver or reviewer selections are listed, click
 , select Number of users required from those assigned, type a number, and then click OK.
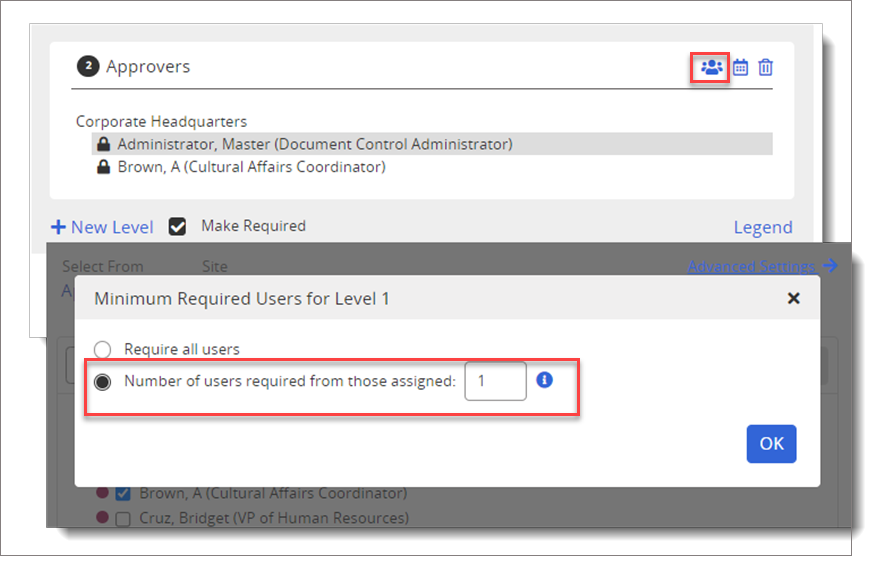
Important: If the Number of users required from those assigned is fewer than the number of users set as Make Required, the content will not proceed to the next step until all users set as Make Required have completed their tasks. This rule does not apply if a group is selected.
-
-
- (Optional) As you assign writers, reviewers or approvers, they are all assigned to level 1 of the collaboration status, meaning that they will all receive tasks at the same time. If you want to specify a specific order, click New Level to create additional levels. When you create multiple levels, all users on the first level must complete their tasks, before the same task can be sent to the users at the next level.
- Click a level to activate it, and then select the users by department, job title, or role for that level.
- Click a user already in a level, and then drag the user to a different level.
- Do one of the following:
- Click Next Step to continue assigning properties.
- Click Save.
6: Assignee
Use this step to designate assignees for the template.
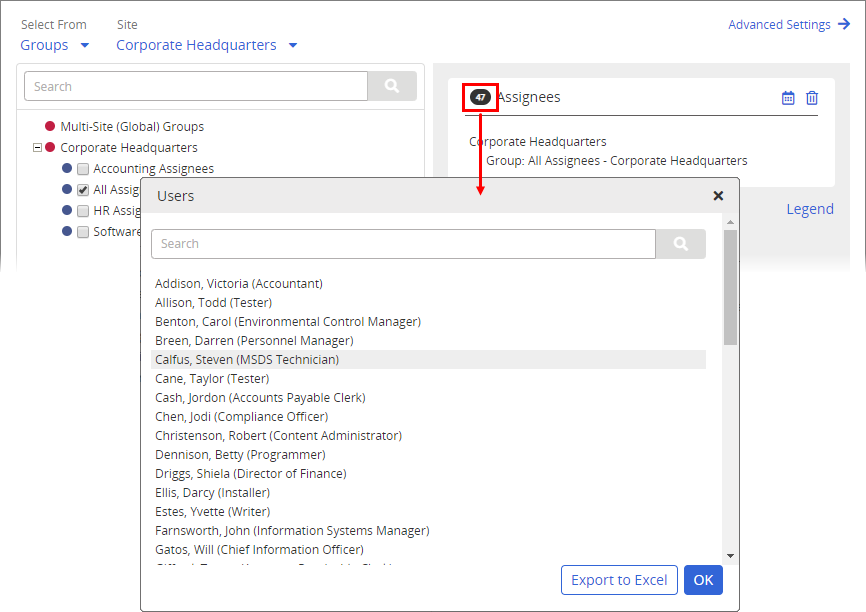
- For Select From, click Assignees, and then select one or more users. To select user by approver group, job title or department, see Selecting Users in a Template.
- If multiple sites exist, select a site containing assignees you want to designate.
- Select one or more assignee.
Note: As you use any of the user selection methods, the total number of currently selected individual users is displayed above the selections in the pane on the right, as shown below.
-
(Optional) Click the user count to view a list of the selected users. While viewing the selected users, click Export to Excel and follow the prompts to export an Excel file containing the names and other identifying information of all selected users.
- By default, assignees receive only one assignment to complete a task based on this template. If you want the assignees to complete the task again periodically, click Advanced Settings.
-
For Recurrence, click Every, and then type a number of months.
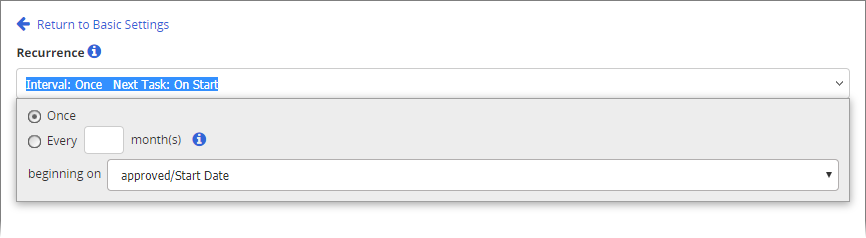
For beginning on, select approved/Start Date. Or, select specified date to have the assessment owner select a beginning date when creating a task from this template.
-
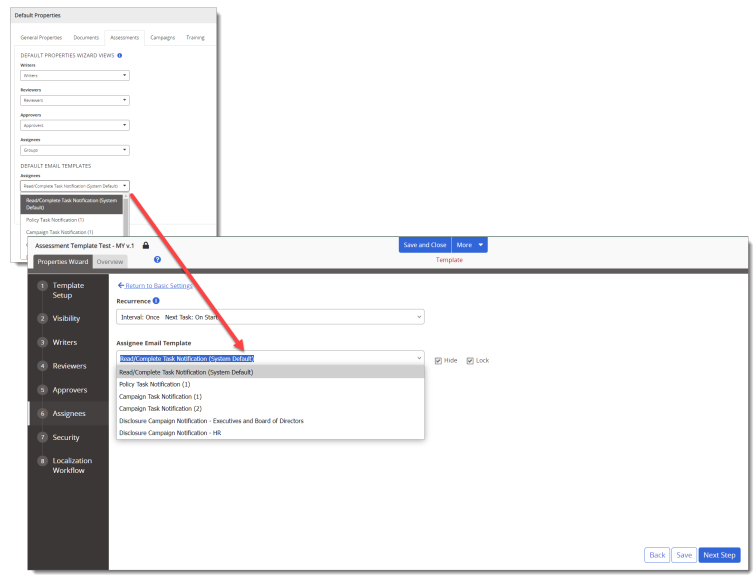
The Assignee Email Template field corresponds to the default email template selected for Assessments under the Default Properties menu. If needed, you can customize this selection for individual documents by choosing an alternative template from the Assignee Email Template list.
- Do one of the following:
- Click Next Step to continue assigning properties.
- Click Save.
7: Security
Use this step to assign different security levels to restrict who can work with, view, or search the contents of an assessment created from this template.
- For Security Level, select from All Users, Restricted - High, or Restricted - Severe. See Security Levels (in a Template) for the various definitions.
- Do one of the following:
-
If you selected the All Users security level (the default setting), click Save.
-
If you selected Restricted - High or Restricted - Severe, for Encryption Mode, select Normal or High.
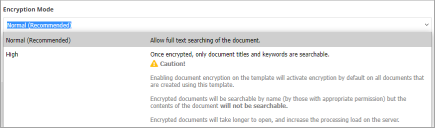 Encryption Modes (in Templates)
The encryption mode determines whether the full text of documents (its content) is searchable in the Search feature. Enabling encryption mode on a template will activate encryption by default on all documents that are created using that template.
The table below lists the encryption mode and a description of its characteristics.
Normal The title, keywords, and full text (document contents) are all searchable. High Once encrypted, only document titles and keywords are searchable. Encrypted documents will be searchable by name (by those with appropriate permission) but the contents of the document will not be searchable. Important: Be aware that documents with high encryption take longer to open and increase the processing load on the Policy & Procedure Management server.
- Click Save.
-
- Click Save and Close.
This publication was written and produced at NAVEX Global, Inc., Lake Oswego, Oregon. This publication or any portion thereof is confidential and/or proprietary and may not be reproduced or used in any manner whatsoever without the express written permission of NAVEX Global, Inc.
Copyright © 2026 NAVEX Global, Inc. NAVEX Global® is a registered trademark/service mark of NAVEX Global, Inc. The NAVEX Global® logo is a trademark/service mark of NAVEX Global, Inc. Unauthorized use of NAVEX Global, Inc.’s trademarks/service marks is strictly prohibited without prior written permission from NAVEX Global, Inc.