Basic Document Import
If you have digital copies of documents that you now want to track in PolicyTech, you can import them. We strongly recommend that you follow the guidelines under "Preparing to Import Documents" below before starting to import documents. The more you prepare, the less confusion and the less manipulation of documents there will be after the import.
Note: If you need assistance with importing documents, call Client Support at 888-359-8123 (toll-free in the U.S. and Canada) or 208-359-8123.
Preparing to Import Documents
Consider the following guidelines before importing documents:
- Document grouping. Your organization's documents may already be grouped by certain criteria, such as by department or by the documents' owners. We recommend that you group documents by document owner and then import the documents of each document owner separately.
- Site, template, document owner. When you set up a document import, you must specify the site, the document owner, and the template for those documents. These entities must exist in PolicyTech before you can assign them to imported documents (see Adding a Site, Assigning Roles, and Creating a Template).
Note: If some of an owner's documents will require a different template than others, you can further group the documents by template, or you can assign the same template to all of the documents and then change the template assignments as necessary using Bulk Edit.
- Bulk Edit. You can assign all other document properties to multiple imported documents at once using Bulk Edit (see Bulk Edit). We recommend that you use Bulk Edit immediately after importing a group of documents—before you import the next group.
- Department assignments. Upon import, documents are assigned to the selected document owner's department. You can change the department assignment later, if necessary, using Bulk Edit.
Performing the Document Import
- Click System Settings, click Document Setup, and then click Import Documents.
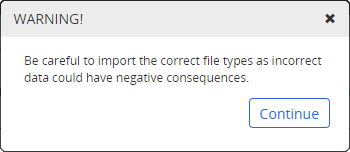
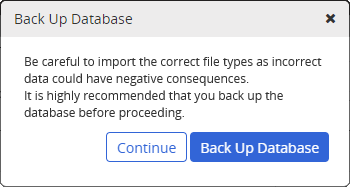
You should now see one of the following warnings, depending on whether your PolicyTech system is hosted by NAVEX Global (first warning) or installed on your organization's premises (second warning).
- Do one of the following:
- If your PolicyTech system is hosted by NAVEX Global, click Continue.
- If you're prompted to back up your database, click Back Up Database, click OK, and then. when the backup is finished, click Close. Because backing up the database automatically logs you out of PolicyTech, log back in and repeat step 1 above. Then, on this step, click Continue.
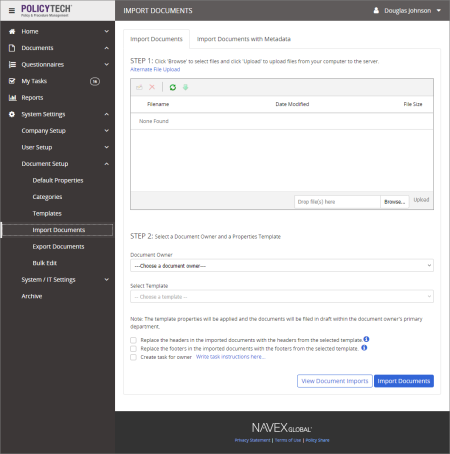
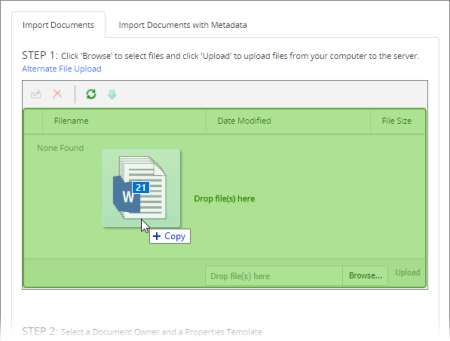
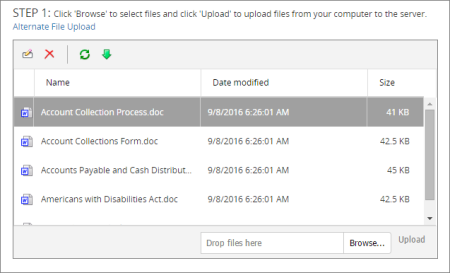
- To select files to upload, do either of the following:
- Click Browse, find and select files, click Open, and then click Upload.
- In Windows Explorer, find and select some files you want to upload, drag them over the file list area of the Import Documents window in PolicyTech, and then, when you see the area highlighted in green, drop the files.
- (Optional) Repeat step 3 as necessary to add files from other locations.
Note: Uploading the documents to the PolicyTech server is the first or staging step in the import process. The files won't actually be imported into the PolicyTech database until you click Import Documents
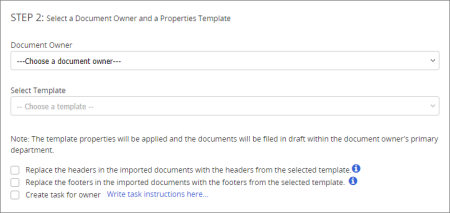
Once the selected files have been uploaded, they are displayed in the file list. You now need to select certain properties that will be assigned to the documents upon import.
- For Document Owner, click a name.
Note: The imported documents will be placed in the document owner's primary site and department.
- For Select Template, click a template.
Note: The Select Template list is disabled until you select a document owner.
- (Optional) If you're importing Word documents, you have the option of replacing headers and footers in the import files with those from the template. Select one or both of the following:
- Replace the headers in the imported documents with the headers from the selected template.
- Replace the footers in the imported documents with the footers from the selected template.
|
Important:
- If the template headers or footers are a different size than those in the import files, the page layout and pagination of the imported files will be affected.
- If any of the imported files are of a type other than Word, the header and footer replacement for those files will fail and be noted in the import status report.
|
- (Optional) To include instructions for the document owner about what to do with the imported documents, select Create task for owner, click Write task instructions here, type instructions, and then click Close.
- Click Import Documents.
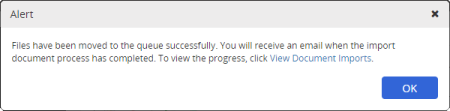
- A message is displayed stating that you'll receive an email once the import process is done. Click OK.
Viewing Import Status Reports
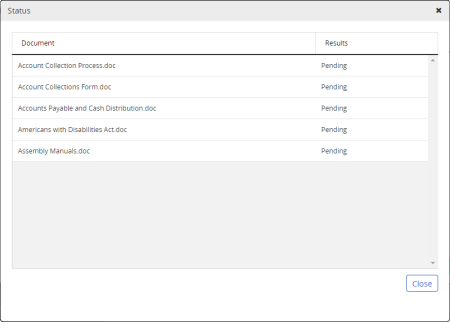
- In the Import Documents tab, click View Document Imports at any time to check import status.
- Click an import name to view status of the individual documents in that import.
If there was a problem with a specific document, the problem is described in the Results column.
- Click Close twice.
Finishing the Setup of Imported Document Properties
After the import process has completed, you can use Bulk Edit to make any other needed changes to the imported documents' properties, such as optional settings or task assignments. See Bulk Edit for detailed instructions.
Finding Newly Imported Documents
The instructions below describe one way to find all of the documents you've recently imported.
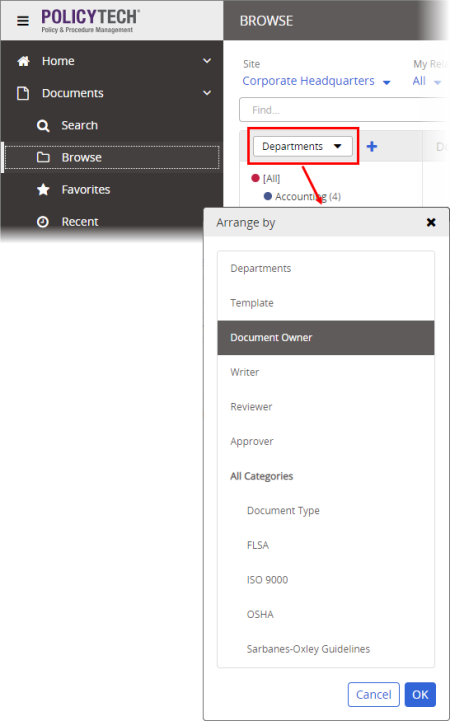
- Click Documents, and then click Browse.
- For Status, click Draft, and then click OK.
- For Arrange by (the menu below the current site selection), click Document Owner.
- Click the name of the document owner assigned to the newly imported documents.
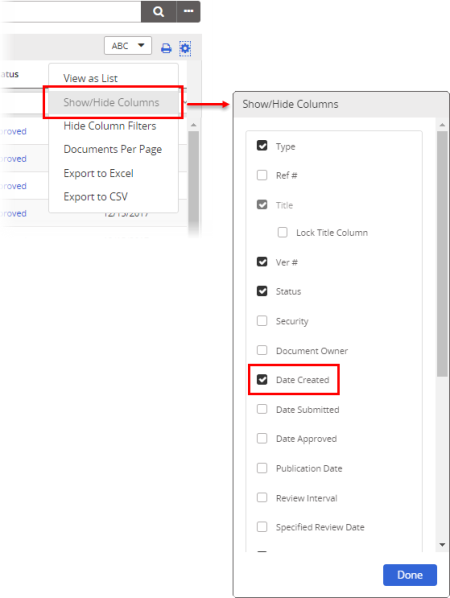
- Click
 , and then click Show/Hide Columns.
- Select the Date Created column, and then click Close.
- In the document list, click the Date Created column twice—once to sort the list by creation date and again to reverse the sort order and display the most recently created documents at the top of the list.