Exporting Documents
|
Important:
- Depending on your PolicyTech license, the Export Documents module is either included or is available as an optional feature and must be purchased. Click System Settings, and then click Content Setup. If you see the Export Documents option, then the feature is already enabled. If the feature is not already enabled and you have questions about or want to purchase the Export Documents module, call Client Support at 888-359-8123 (toll-free in the U.S. and Canada) or 208-359-8123.
- Exported documents are no longer under version control.
- If you need to move documents from one PolicyTech system to another, please contact Client Support for guidance in order to avoid possible adverse and irreversible issues.
|
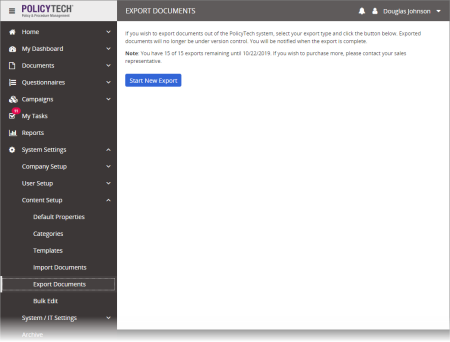
- Click System Settings, click Content Setup, and then click Export Documents.
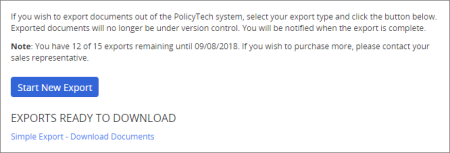
Important: Your PolicyTech license or your purchase of the Export Documents module includes a certain number of exports per year. Each time you perform an export, regardless of its type (simple export, export with metadata, or Emergency Document Access), one of your annual export instances is used. The number of export instances remaining is displayed when you click Export Documents.
- Click Start New Export.
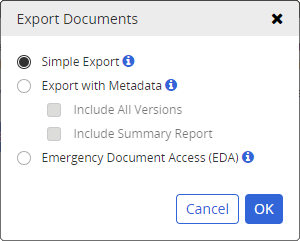
- Do one of the following:
- To export the selected documents in their original file formats, click Simple Export.
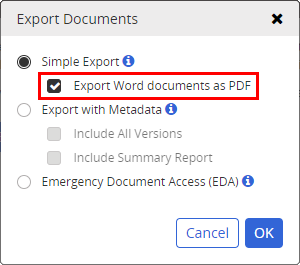
- To export the selected documents and convert any included Word documents to PDF at the same time, click Simple Export, and then select Export Word documents as PDF. (Selecting Export Word documents as PDF has no effect on other document types, which will be downloaded in their original file formats.)
Important: The option to download Word documents as PDFs will only be available if it was enabled when the Document Export Module was purchased and if PDF Converter has also been enabled (see Set Up PDF Converter).
- To export the selected documents along with an Excel spreadsheet containing document metadata (certain Property Wizard settings and other document information) , click Export with Metadata. This option facilitates moving (exporting and then importing) documents from one PolicyTech system to another.
Important: To avoid adverse and possibly irreversible issues, please contact Client Support for guidance before attempting to move documents from one PolicyTech system to another.
If you select Export with Metadata, you also have the options of including all versions of each selected document (instead of only the latest version) and including a summary report for each selected document that shows the document's properties and history.
- To export the selected documents along with a basic viewer for browsing and searching for document, click Emergency Document Access (EDA).
- Click OK to continue.
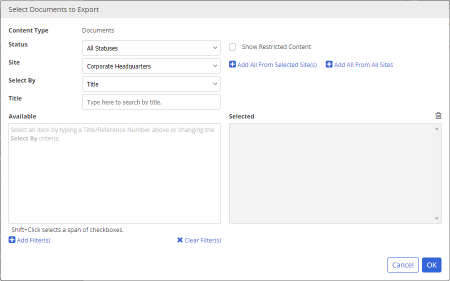
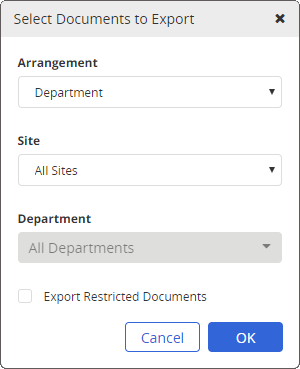
- Do one of the following:
Important: If you include restricted documents and need to protect them, you should perform more than one export and place them in different locations to control access. For example, you could export all unrestricted documents and place them in a generally accessible network folder, and then export all restricted documents and place them in a limited access network folder.
Important: If you include restricted documents and need to protect them, you should perform more than one export and place each in different locations to control access. For example, you could export all unrestricted documents and place them in a generally accessible network folder, and then export all restricted documents and place them in a limited access network folder. If restricted documents are not already selectable by department or category, cancel this export, assign restricted documents to a specific department or category, and then restart the export. (Make sure the restricted documents are not also assigned to a department or category used to export unrestricted documents.)
- Click OK to place the export in a queue for processing by the PolicyTech server.
You are returned to Export Documents with a progress bar displayed. The time it takes to complete the export depends on the number and sizes of the documents.
When the export is complete, PolicyTech sends you an email with the subject Document export results. If Export Documents is not currently displayed in PolicyTech, click the link provided in the email to go there.
- In Export Documents, click Download Documents to save the zip file locally.
- Extract the zip file's contents.
Note: If you exported documents with their metadata and chose to include summary reports, you can find those reports in a folder named SummaryAndAttachments after extracting the contents of the exported zip file.
- (Conditional) If you exported EDA documents or documents with their metadata, do one of the following:
- EDA export: In the PolicyTech_EDA_[download date] folder, double-click index.htm to open the EDA viewer.
- Documents with metadata export: In Export Documents, also click Download Metadata, and then save the Excel spreadsheet.