Template Setup Step for Documents
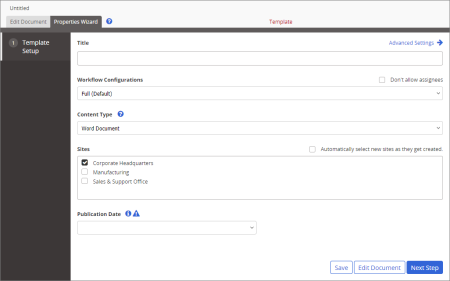
When you create a new document template, you see a screen similar to the one below with only the first step—Template Setup—of the Properties Wizard displayed.
- Type a title.
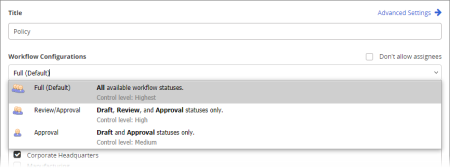
- For Workflow Configurations, select one of the following options:
- Full (Default): Enables the following task assignment steps: Writers, Reviewers, Approvers, Assignees.
- Review/Approval: Enables the following task assignment steps: Reviewers, Approvers, Assignees.
- Approval: Enables the following task assignment steps: Approvers, Assignees.
- Draft and Started/Published: Enables only the Assignees task assignment step. This option is only available if PolicyTech has been configured to allow it (seeDefault Content Properties: Workflow).
Note: Document owners can choose to skip the Writers and Reviewers steps, even when they are included in the template. However, adding one or more required reviewers prevents skipping of the Reviewers step. The Approvers step is always mandatory, unless the Draft and Started/Published option has been selected.
- (Optional) To prevent document owners from designating assignees to read or be notified of documents created from this template when they are published, select Don't allow assignees. This removes the Assignees step.
- For Content Type, select Word Document, HTML Document, Excel Spreadsheet, PowerPoint Presentation, or Upload a File.
- If multiple sites exist, select those where you want this template available.
- (Optional) If this template is one you want all sites that might be created in the future to have access to, select Automatically select new sites as they get created.
- (Optional) By default, documents created from this template will be published as soon as they are approved. If needed, select Wait until specified date for Publication Date. When creating a document from this template, the owner will then need to specify the publication date. (It cannot be preset in the template.) Also, select Require completion before publication if you want the reading task notification sent as soon as documents created from this template are approved. Assignees can then access assigned documents during the interval (the Pending status) between approval and publication.
|
Notes:
- If a document is approved after the specified publication date, the document will be published immediately.
- Users who mark a document as read before the publication date will not be required to read that document again when it is published.
|
- Click Save.
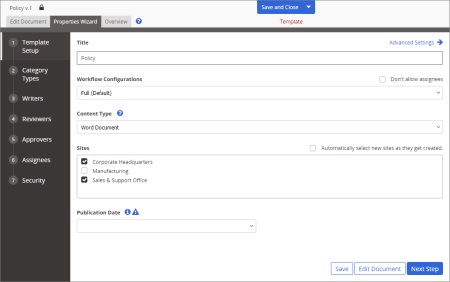
Important: You must save the template at this point before you can access Advanced Settings and the other Properties Wizard steps.
You should now see all Properties Wizard steps included in the template, as shown below.
- (Optional) Click Advanced Settings, and then make adjustments as needed. See Advanced Settings: Template Setup Step for a Document Templatefor details.
- Do one of the following: