High-Level Steps for Creating a Document (Mac)
The following steps provide an overview of the document creation process, along with references to more detailed instructions.
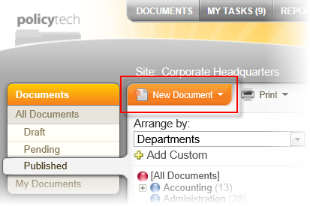
- Click DOCUMENTS. If you are a document owner, you will see the New Document option, as shown below.
Note: If you do not see the New Document option, then you have not been assigned the document owner role. Contact your document control administrator if you have questions.
- Click New Document, and then click one of the following:
- Word Document
- Excel Spreadsheet
- Upload a File
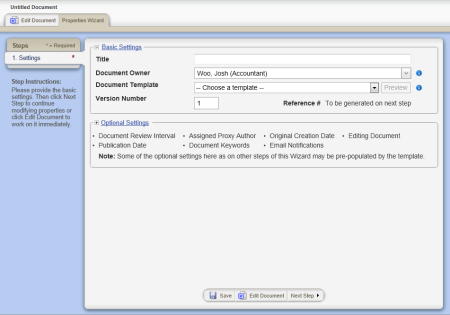
Your screen should now look similar to the one below. These settings constitute the first step of the Properties Wizard, which guides you through all of the available document properties.
- Work your way through the Properties Wizard steps, which are fully described in Assigning Document Properties.
Important: You must at least type a title, choose a template, and then save the document before you can see the remaining Properties Wizard steps and edit the document.
- Click Edit Document.
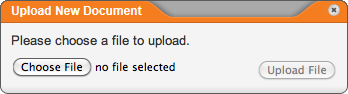
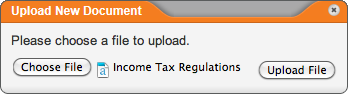
- You should now see the window shown below. Click Choose File.
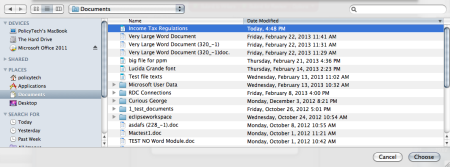
- In the Mac Finder, find and click the document you want uploaded, and then click Choose.
- The file name now appears in the Upload New Document window. Click Upload File.
- The following window appears when the upload is finished. Click OK.
Note: You may have to minimize the default program window or switch windows back to PolicyTech to see this Alert window.
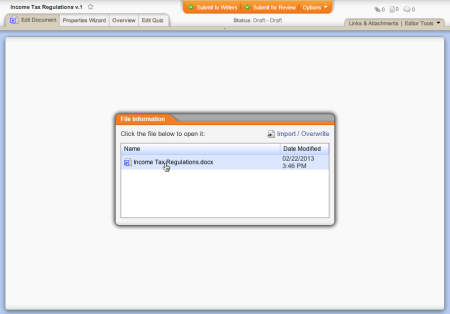
- In the File Information window, click the document file name.
Note: You can import (re-upload) an external document to replace the contents of the PolicyTech file at any time. See Importing Content for details.
- The file opens in its default program. While working on the document outside of PolicyTech, be sure to save it periodically. PolicyTech detects each time the document is saved re-uploads a copy of it.
Note: If you see the Alert window below after you click the file name, go to Enabling WordModulePlus.
- (Optional) Add links to and attachments for supplementary and reference materials (see Attaching Files and Adding Reference Links).
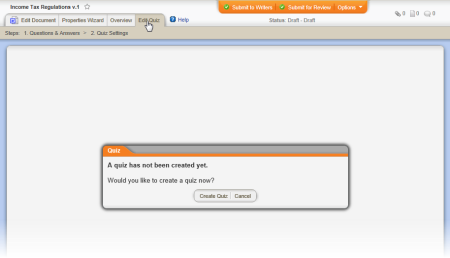
- (Optional) Create a questionnaire that readers must pass in order to mark the document as read (see Creating a Questionnaire).
- (Optional) Start a discussion about the document (see Working with Document Discussions).
- (Optional) Select the documents this new document will replace (see Designating a Document to Be Replaced).
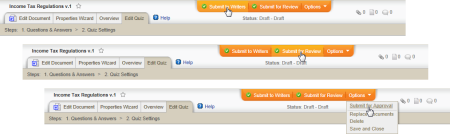
- Submit the document to writers, for review, or for approval (see Submitting a Document to Writers, Reviewers, or Approvers).
- Manage the document through the review and approval process (see Working with Documents in Review and Approval).