Step 1: Settings
- If you have not already started a new document, click DOCUMENTS, click New Document, and then click one of the following:
- Word Document
- HTML Document
- Excel Spreadsheet
- Upload a File
|
Notes:
- The document options you see depend on what template types have been created in your organization's PolicyTech system. If you need to create a document of a type listed above but not currently available in PolicyTech, contact your document control administrator, who can create a template for that type.
- In addition to Word and Excel, you can use PowerPoint or Visio as authoring tools to create PolicyTech documents. For these document types, select Upload a File as the document type.
|
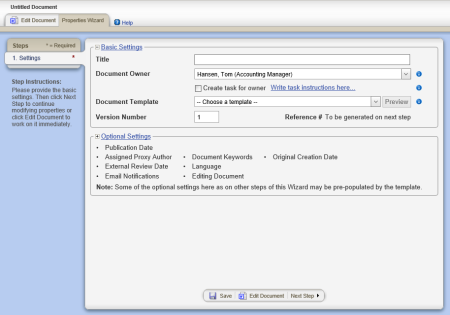
The new document opens with only the first step—Settings—of the Properties Wizard displayed.
- Type the document title.
- Do one of the following to select a document owner:
- If you have been assigned the document owner role, your user name is automatically selected. Move on to step 4.
- If you have been assigned as proxy author for a single document owner, that document owner's user name is automatically selected. Move on to step 4.
- If you have been assigned as proxy author for more than one document owner, in the Choose a document owner list, click a user name.
- If you are a document control administrator (DCA), in the Document Owner list, click a user name.
Note: If you are a DCA but have not been assigned the document owner role, you cannot assign the document to yourself.
- (Optional) To create a task and add it to the document owner's My Tasks list, select the Create a task for owner check box, and then click Write task instructions here. Type the task instructions, and then click Close.
This option can be especially useful if you are creating or editing the document as a proxy author or DCA and need the document owner to do something regarding this document, such as submitting it for review.
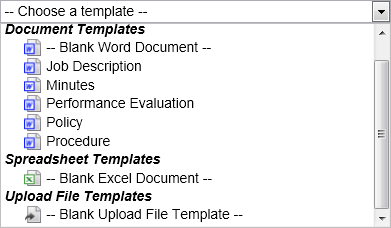
- Your DCA can create any number of templates with specific settings and assignments in the Properties Wizard and with document content, such as section headings. In the Document Template list, click a template for the type of document you are creating (Microsoft® Word, Excel®, HTML, or upload).
|
Notes:
- Click Preview to open a separate window with the template contents displayed. Click the Overview tab in the previewer to see template settings and assignments.
- The template list includes all templates from all sites you have access to.
- If you select a template for a document type that is different than the type you selected from the New Document menu, the document will be changed to that type when you click Save.
- If you plan to use PowerPoint or Visio as your document authoring tool in PolicyTech, select an upload file template. Then, when you're ready to add content to the new document, you will start by uploading an existing PowerPoint or Visio file. The file you upload can already contain content or be completely empty.
- Your list of templates will most likely be different than the one shown below.
- If you have questions about which template to use, contact your DCA.
|
- (Optional) The default version number for a new document is 1. One instance where you might want to change the version number is if you are uploading a document from outside the PolicyTech™ system and that document is a version other than 1.
Note: You cannot change the version number after the document has been approved.
- (Optional) Depending on how your document control administrator has set up PolicyTech, you may or may not need to enter a reference number.
- If you see To be generated on next step after Reference #, move on to step 7.
- If you see a blank box after Reference #, type a number. The number can contain numbers, letters, and all other standard characters except <, |, and ^.
Important: A document's reference number must be unique throughout the PolicyTech system. If you are not sure what numbering scheme your organization is using, contact your DCA.
- Click Save.
Important: You must save the document at this point before you can access Optional Settings and the other Properties Wizard steps.
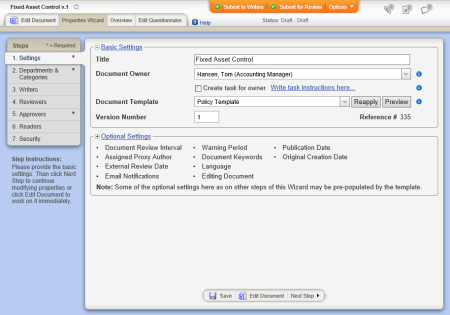
You should now see all seven Properties Wizard steps, as shown below.
Note: These instructions assume that your DCA has not removed steps from the document workflow. If you do not see all seven Properties Wizard steps, skip the instructional steps that do not apply.
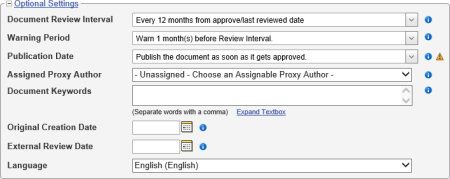
- (Optional) Click Optional Settings, and then change one or more settings. See Optional Document Settings for details on each setting.
- Do one of the following:
- To stop assigning properties and finish later, click Options, and then click Save and Close. (When you are ready to continue with assigning properties, go to Editing a Draft Document.)
- To work on document content, click Edit Document. (When you are ready to continue with assigning properties, if the document is still open click Properties Wizard, or go to Editing a Draft Document if you need to reopen it.)