Selecting Documents
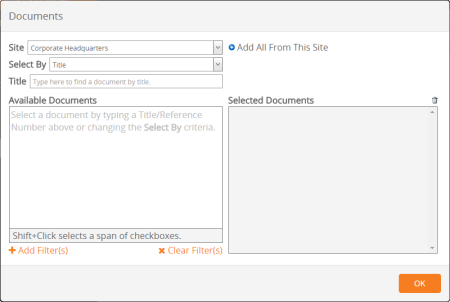
The steps that follow assume that you have already found and opened a document report or selected the Custom Print option, and that a window similar to the one below is displayed.
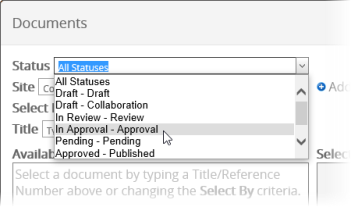
- (Conditional) If a Status option is included, click the status of the documents you want included in the report or click All Statuses.
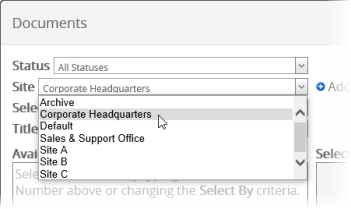
- (Conditional) If your PolicyTech system includes multiple sites, select the site containing some or all of the documents you want included in the report.
|
Notes:
- To select all documents from the current site, click Add All From This Site, and then skip to step 5.
- After completing steps 2 through 6, repeat them to add documents from other sites.
|
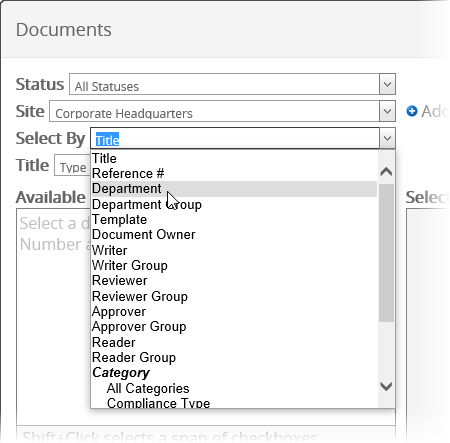
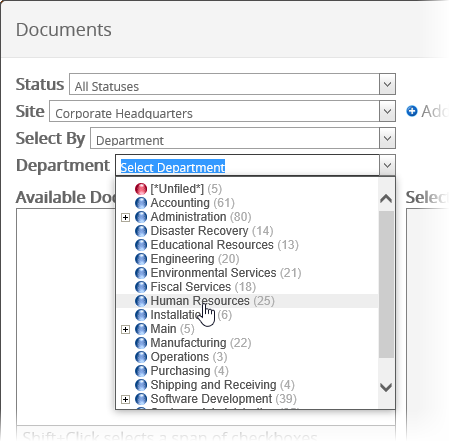
- In the Select By list, click an option for how you want to find documents.
- The list below Select By changes, depending on your Select By choice. For example, if you choose to select documents by department, a list of departments appears below the Select By list.
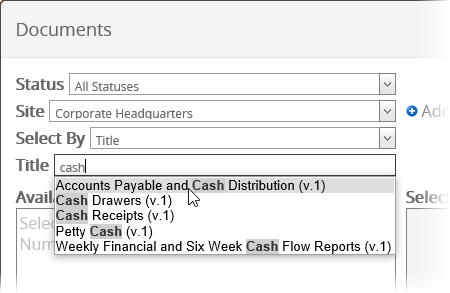
- If you selected Title or Reference #, move on to step 6.
- If you chose any of the other Select By options, in the list below Select By click an item to display all documents assigned to that item. For example, if you chose Department for Select By, click a department to display all documents assigned to that department.
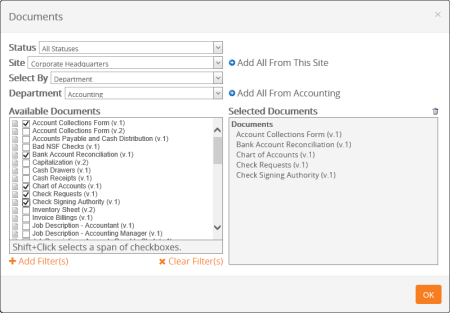
- (Optional) To narrow a long list of available documents, add one or more filters (see Adding Document Filters for details).
- Do one of the following to select documents:
- If you chose Title or Reference # for Select By, start typing some text that you believe is in a document's title or reference number. When you've typed at least three characters, a list appears of titles or reference numbers matching what you've typed. Continue typing if you need to narrow the list. As soon as you see the title or reference number you want, click it.
Note: Unlike other Select By options, the Title and Reference # options limit you to selecting documents one at a time.
- Select individual documents from the Available Documents list.
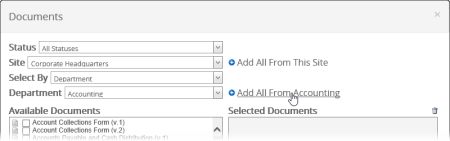
- To quickly add all documents from the list, click Add All From [Select By item].
- Click Add All From This Site.