Designating Assignees for a Document
Assignees are those users you designate to read the document. You can assign any Policy & Procedure Management user as either a required assignee or as an assignee who will only be notified that a document is available. When the document is published, all required assignees receive an email notification and a task to read the document, while "notify only" assignees receive only a notification email (no task assignment). For required assignees, you can choose to simply have each assignee mark the document as read, or you can include an assessment that assignees must pass to mark the document as read.
Designating assignees is an optional Properties Wizard step. (A template cannot include required assignees—only optional assignees.) If you do not designate any assignees, the document will still be accessible via Browse and Search to all users with the assignee role that have access to the sites to which you assign the document.
Designate Assignees for a Document
-
From an open document, click the Properties Wizard tab, and then click Assignees.
- First check to see if the template included assignees. Any assignees added by the template are optional and can be treated as suggestions. To remove an optional assignee, group, department, or job title that may appear, click it, and then click
 .
. - For Select From, designate assignees by individual user, by group, by department, or by job titles.
 Select Assignees
- Do one of the following:
- If Assignees or Groups are listed, select one or more of the listed items.
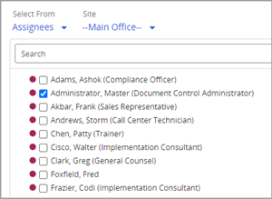
- If Departments, Department Groups, or Job Titles are listed, click one, select one or more users, and then click OK.
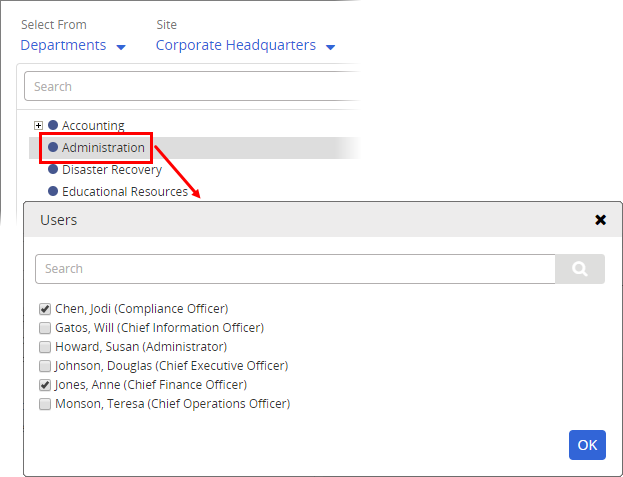
- If Assignees or Groups are listed, select one or more of the listed items.
Important: As you use any of the selection methods above, the total number of currently selected individual users is displayed above the selections in each level, as shown below.

Click the user count to view a list of the selected users.
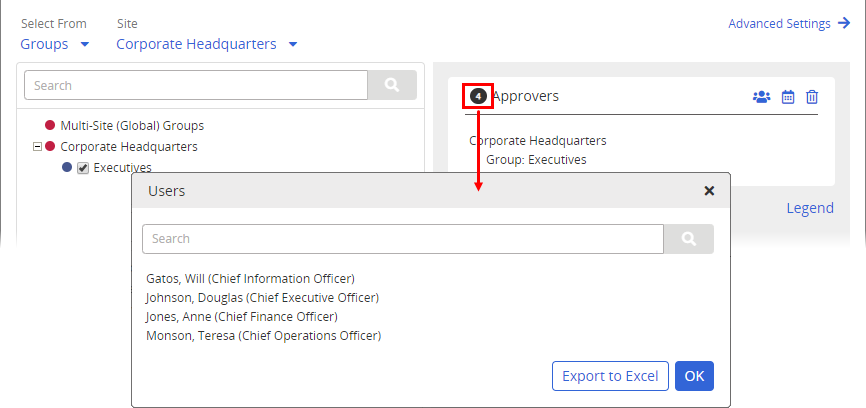
While viewing currently selected users, do either of the following:
- Use Search to find a specific user in a large list.
- Click Export to Excel and follow the prompts to export an Excel file containing the names and other identifying information of all selected users.
- Do one of the following:
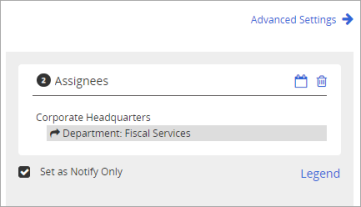
- By default, selected assignees receive a task that they must complete by reading and then marking the document as read. To only notify certain users that the document is available once it has been published and not give those users reading task assignments, click the assignee name, group, department, or job title in the pane on the right, and then select Set as Notify Only. Notice that "Notify Only" assignees are marked with
 .
.
Note: To select multiple assignee entities, hold down the Ctrl key as you click each one. To select all items (or a contiguous group of items), click the first one and then hold down the Shift key as you click the last one.
-
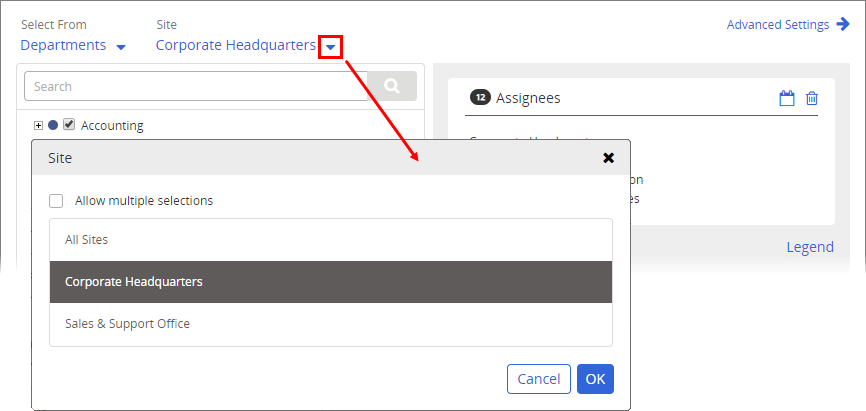
For Site, do one of the following.
-
Leave the default site selection to select assignees from the current site.
- Select a different site, and then click OK.
-
Select Allow multiple selections, select two or more sites, and then click OK.
-
- (Optional) Set a due date for when assignees should be finished. (This option does not apply to "Notify Only" assignees.) See Setting Due Dates for Writing, Review, Approval, and Assignee Tasks for details.
- (Optional) Click Advanced Settings, and then, for Recurrence, click Once or Every. If you clicked Every, then type a number, and then, for Start on, click approved/publication date, or click specified date, and then select a date.

- (Optional) Click Advanced Settings, and then click Add Note to include instructions or other information for the assignees. See Adding Notes for Writers, Reviewers, Approvers, and Assignees for details.
- Do one of the following:
- To continue with assigning properties, click Next Step, and then go to Adjusting Security Settings for a Document.
- To stop assigning properties and finish later, click More, and then click Save and Close.