Assigning a Proxy Author
A proxy author is a user who creates content on behalf of an owner. When you designate a user as a proxy author, you must also designate one or more owners the user can proxy for.
The following describes what a proxy author can and cannot do:
- Can create documents or questionnaires for assigned owners only
- Can access and edit all draft content items for assigned owners regardless of whether they were created by the proxy author or the owner
- Cannot submit a content item for review or approval but can request that the owner do so
- Can view assigned owners' content items throughout the review and approval process
How you assign a proxy author depends on whether you're doing it from the owner's user form or from the user's form whom you want to assign as a proxy author.
Assign a User as a Proxy Author
Note: Proxy authors can only be assigned to users assigned the Document Owner or Questionnaire Owner role.
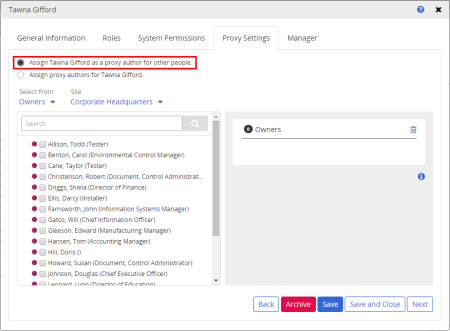
- With a user form open, click the Proxy Settings tab.
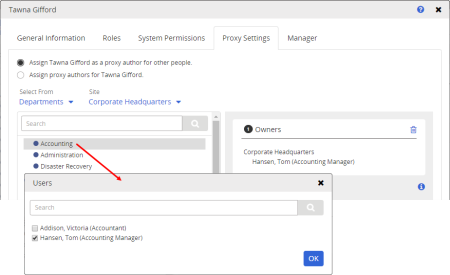
- Click Assign [user name] as a proxy author for other people.
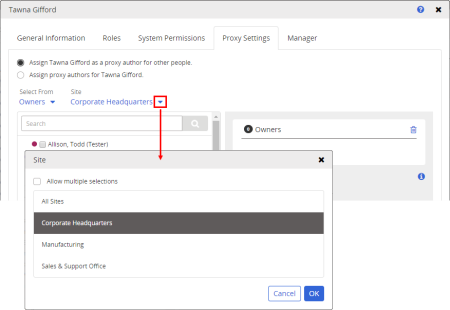
- If multiple sites exist, select the site or sites containing one or more owners the current user will act as proxy for.
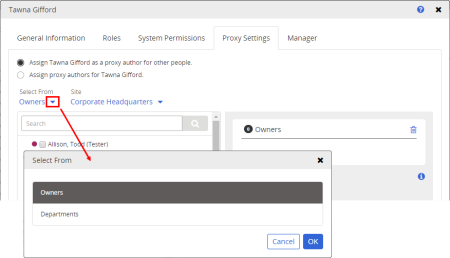
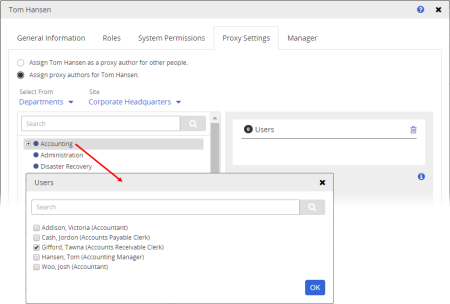
- (Optional) A list of owners is shown by default. To select owners by department, under Select From, click
 , click Departments, and then click OK.
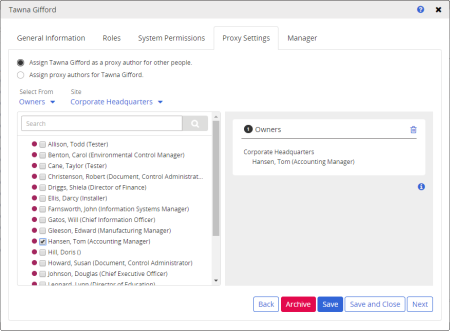
- Depending on the current Select From setting, do one of the following:
- Select one or more owners.
- Click a department name, select one or more owners from that department, and then click OK.
Note: To remove a selected name, click it, and then click  .
.
- (Optional) To assign the current user as a proxy author to another owner, repeat steps 3 through 5.
- Do one of the following:
- Click Save, and then continue with one of the following user setup tasks:
Providing General Information
Assigning Roles
Assigning System Permissions
Assigning a Manager
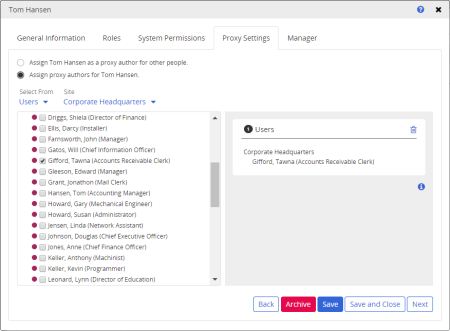
Assign Proxy Authors to an Owner
Note: Assigning proxy authors takes effect only when the current user is assigned an owner role.
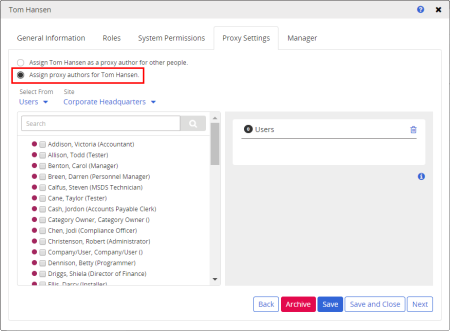
- With a user open, click the Proxy Settings tab.
- Click Assign proxy authors for [user name].
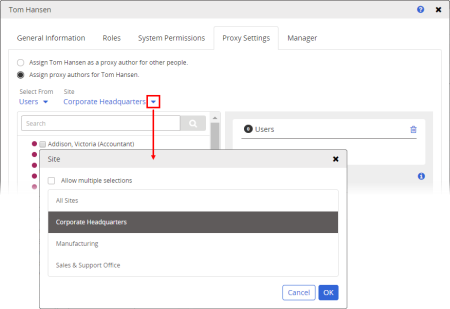
- If multiple sites exist, select the site or sites containing the user or users you want to assign as proxy authors.
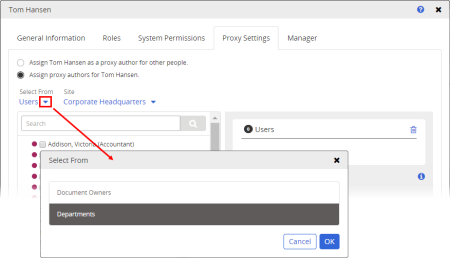
- (Optional) A list of users is shown by default. To select users by department, under Select From, click , click Departments, and then click OK.
- Depending on the current Select From setting, do one of the following:
- Select one or more users.
- Click a department name, select one or more users from that department, and then click OK.
Note: To remove a selected name, click it, and then click .
- (Optional) To assign another proxy author to the current user, repeat steps 3 through 5.
- Click Save or Save and Close.