Document Import with Metadata
This method of importing documents consists of the following high-level steps:
- Configuring PolicyTech in preparation for the imported documents
- Uploading the documents
- Preparing the document metadata spreadsheet
- Uploading the metadata spreadsheet
- Handling import errors
- Starting the import
Configuring PolicyTech
When you prepare the document metadata spreadsheet, you must assign certain entities, such as document owners and templates. These entities must already exist in PolicyTech for a metadata import to be successful.
Important: A successful PolicyTech configuration requires much thought and planning. If you have not already done so, we strongly recommend engaging NAVEX Global Professional Services to help with your PolicyTech implementation.
Of the PolicyTech entities and properties that can be assigned using the metadata spreadsheet, some are required and some are optional. You must configure at least the required entities and properties prior to a document import with metadata.
Required configurations:
Templates (see About Templates and Creating a Template)
Document owners (see Adding a User Manually and Assigning Document Roles)
Sites (see Working with Sites and Adding a Site)
Departments (see Working with Departments and Adding a Department)
Optional configurations:
Proxy authors (see Assigning a Proxy Author)
Categories (see About Categories and Adding a Category)
Languages (see Language Files)
Reference number setting (see Default Document Properties: Reference Number)
Uploading the Documents
Important: The Import Documents with Metadata feature is for importing new documents only. Do not use this feature to update the metadata of existing documents.
- Click PREFERENCES.
- Click Document Setup, and then click Import Documents.
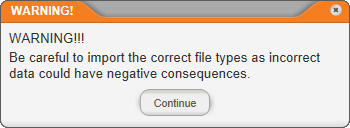
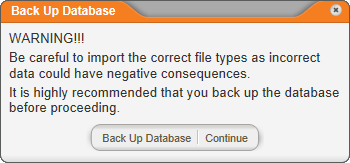
You should now see one of the following warnings, depending on whether your PolicyTech system is hosted by NAVEX Global (first warning) or installed on your organization's premises (second warning).
- (Conditional) If you're prompted to back up your database, we highly recommend that you back up the PolicyTech database before you import documents. Click Back Up Database, and then click OK. When the backup is completed, click Close.
- Click Continue.
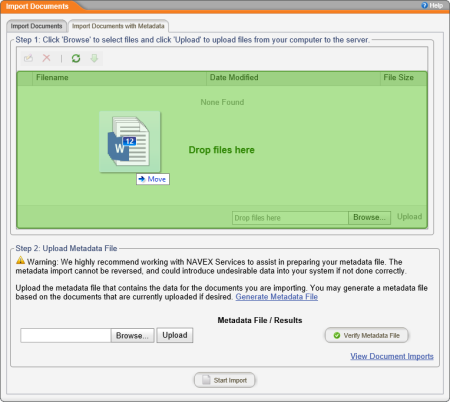
- Click the Import Documents with Metadata tab.
- To select files to upload, do either of the following:
- Click Browse, find and select files, click Open, and then click Upload.
- In Windows Explorer, find and select some files you want to upload, drag them over the file list area of the Import Documents window in PolicyTech, and then, when you see the area highlighted in green, drop the files.
Preparing the Document Metadata Spreadsheet
Important: To avoid unforeseen and possibly irreversible issues, we strongly recommend that you have NAVEX Global Professional Services help with preparing the document metadata spreadsheet.
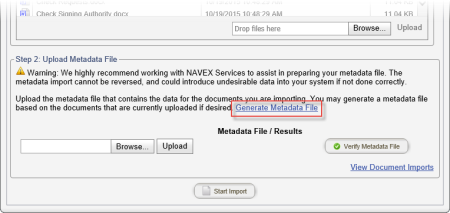
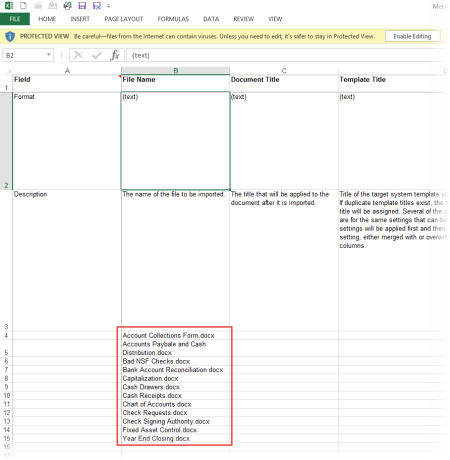
- To download the metadata spreadsheet template, in the Step 2: Upload Metadata File area, click Generate Metadata File, and then open the file.
The Excel template will contain the names of the files you've already uploaded.
- Enable editing in the Excel file.
- Using the field descriptions as a guide, fill in at least the required information for each document.
- Save and close the spreadsheet.
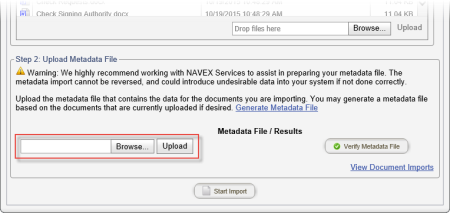
Uploading the Metadata Spreadsheet
- In the Step 2: Upload Metadata File area, click Browse, find and click the metadata spreadsheet you prepared, and then click Upload. The name of the uploaded file appears under Metadata File / Results.
Before starting the import, it's important that you verify your metadata spreadsheet to check for errors.
- Make sure that the metadata spreadsheet is closed in Excel, and then click Verify Metadata File.
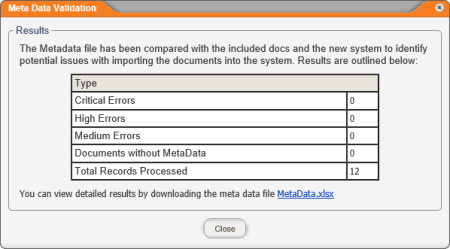
The results are shown in a table like the one below.
- Depending on the results, do one of the following:
- If errors exist, click the file name to open a read-only copy of the metadata spreadsheet containing detailed explanations of the errors, close the Metadata Validation window, and then move on to the next section ("Handling Import Errors").
Handling Import Errors
There are three error levels:
- Critical (red): If a particular piece of a document's metadata includes a critical error, none of that document's metadata can be imported. For example, if the cell for the document's title or template is left blank, none of that document's metadata will be imported.
- High (orange): This error level applies to a piece of document metadata that cannot be imported as it is but that will not cause the import of the rest of the metadata for the document to fail. The piece of defective metadata will either be ignored or replaced with a valid value.
- Medium (yellow): A medium error calls your attention to a piece of metadata that will be imported if you continue but that may or may not be the specific metadata assignment you intended. For example, suppose you include both a site reference ID and the optional site name, and PolicyTech finds the site reference ID but not the specified name. If you go ahead and complete the import, PolicyTech will assign the site with the matching reference ID, but that site may or may not be the one you intended to assign to the document.
In addition to errors, the results you see after clicking Verify Metadata File may include a number for Documents without Metadata. This means that one or more documents were uploaded that have no corresponding row of information in the uploaded metadata spreadsheet.
- In the metadata spreadsheet you just opened, click Enable Editing.
- Look in the Field column (column A) for any cells with a fill color (red, orange, or yellow), which indicates that there is an error with the document metadata on that row. Look in that row for other colored cells, and then point to a colored cell to display the error detail.
Important: Be sure to scan the entire row for colored cells as there may be multiple errors for the same document.
- Open the original metadata spreadsheet you prepared and uploaded, and then make the needed changes.
- Repeat the steps in the "Uploading the Metadata Spreadsheet" section above.
Starting the Import
Once the uploaded metadata spreadsheet validates with no errors (or with only high and medium errors that you chose not correct), you can start the document and metadata import.
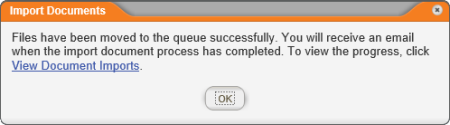
- Click Start Import.
- When you see the message telling you that the documents and metadata have been queued for processing, click OK.
|
Notes:
- To check an import's status, click View Document imports. Click the import name to view individual document status.
- To cancel a scheduled import, click View Document Imports, click the import name, click Cancel Import, and then click Yes.
|